Retaining State of The Angular App When Page Refresh With NGRX
Most of the web applications are written with SPA frameworks such as Angular, React, Vue.js, etc. The problem with these SPAs is that the single page is loaded in the browser once and then the framework will take care of all the routing among pages and gives the impression to the user that it is a multi-page application. When you refresh your page in the browser that single page called index.html is reloaded and you will lose the entire state of the application.
There are ways you can retain the state of the application in those cases. One way is to make the necessary API calls to the backend server and retrieve the data again. This works well if you have a small number of calls but, it strains the server. Another way is to design your application in such a way that when you put the data in the local storage and retain it as soon as the page is loaded in the browser.
In this post, we will see how we can retain the state of the application in Angular apps with the help of NGRX store and local storage.
Prerequisites
Example Project
Problem
Solution
Implementation
Demo
Summary
Conclusion
Prerequisites
There are some prerequisites for this article. You need to have nodejs installed on your laptop and how http works. If you want to practice and run this on your laptop you need to have these on your laptop.
This is going to be a big post if I included the whole implementation of the project. So, I created separate posts for the actual implementation of the project without the NGRX store and one with NGRX Store. If you are a beginner to the Angular you can have a look at the below post. Otherwise, you can skip to the next section. This post is about step by step guide on how to develop an Angular app with NodeJS backend.
Let’s have a look at the example project. We have a simple app in which we can log in, signup, and add tasks, delete tasks, and edit tasks, etc. The entire application state is maintained with NGRX. We have actions, effects, reducers, etc. We will see all in this example.
Example Project
Here is the example project in the GitHub where you can clone and run it on your local machine.
The problem we are facing is that when you load the Single Page Application in the browser you actually load the index.html with all the requiring libraries only once. From then on, the Angular framework kick in and loads the appropriate modules and pages as route changes. When you refresh the page you lose all the state of the application since you are reloading the index.html with all the required dependencies again.
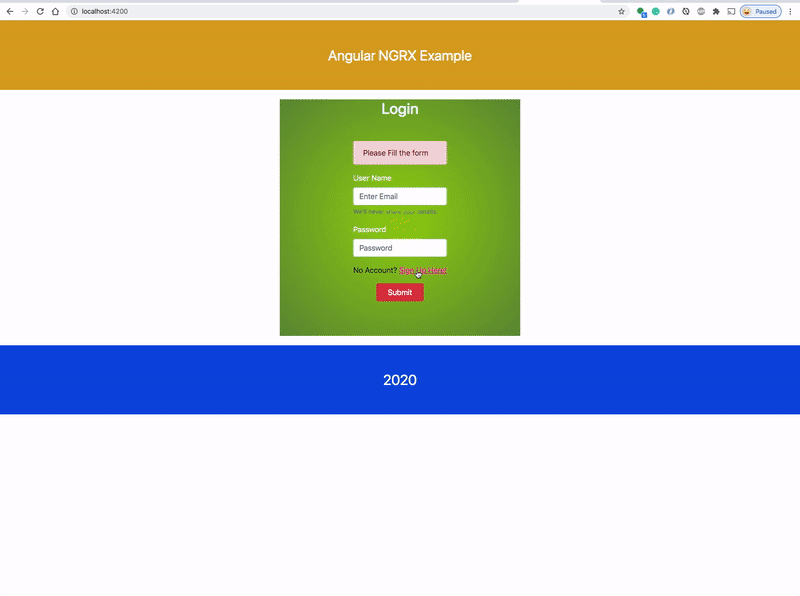
Example Scenario
For example, lets look at the above scenario with the example project provided in the article. We signed up and logged in. You can see the logged in user profile information on the right side of the header and created tasks as well. But, as soon as you refresh the page the entire state of the app is lost and you can’t see the logged in user information in the header and tasks.
Solution
As I said earlier we have so many options to maintain the state and we are seeing how we can preserve the sate with the help of NGRX store and local storage in this example.
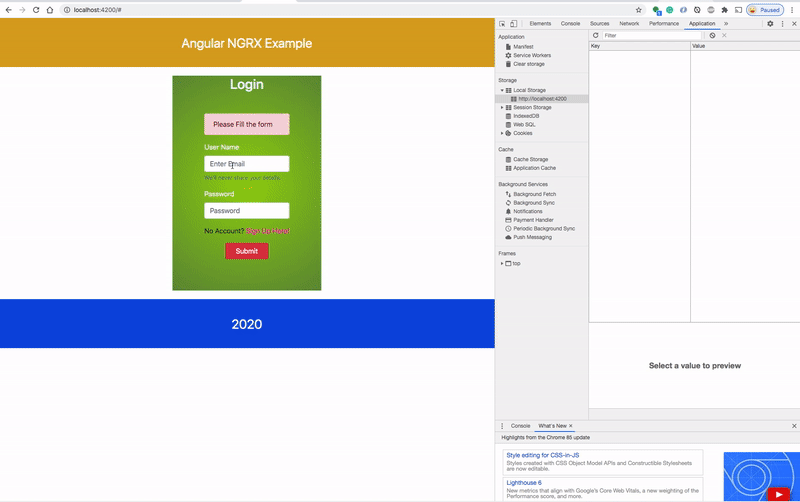
Retaining the state with NGRX Store and Local Storage
If you look at the above diagram, when you refresh the page or reload the page you are saving the application state in the local storage and retrieve it after the reload and populate the reducers. As long as the reducers are populated with the current state all the components subscribed to the store receive the data. This is what we call regydration of NGRX store. You can retain the state in this way. Let’s see the implementation step by step below.
First we need to define separate file which handles all the storage related activities. It has the following operations such as getting current state, get item, get item by key, save state, save item, etc. You can define functions based on your requirement.
Install the below library called ngrx-store-localstorage as a dependency with the following command
npm install ngrx-store-localstorage --save
Once you installed this one you have to register the reducers with it so that the library automatically syncs that particular reducers with the localstorage. You don’t have to do anything explicitly. Here is the index.ts file where you register all the reducers with the local storage with the help of ngrx-store-localstorage. Notice the lines 8, 23, 24,25. Since we have to preserve both user information and tasks information you have to register both reducers.
This part takes care of the automatically populate the state in the reducers to the localstorage with the key name as reducer names. Now, you have the data in the local storage how you can retrieve this and populate the reducers when the page refresh happens.
Let’s see how we can achieve that with help of stoarge.ts file that we defined above. We have initial state in each reducer as below you need to populate the initial state from storage by reading the appropriate keys as shown in the following reducer files. Notice the initial state of each reducer we are reading from the local storage/session storage.
We have implemented the solution, let’s see the demo we can see that we can preserve the state of the application once we login and create tasks.
Demo
We can see the library ngrx-store-localstorage in action below. As soon as you add anything and send that it store it automaticllay puts that state in the local storage. As we add tasks the library automatically updates the local storage.
Demo
Summary
The problem with these SPAs is that the single page is loaded in the browser once and then the framework will take care of all the routing among pages and gives the impression to the user that it is a multi-page application.
When you refresh your page in the browser that single page called index.html is reloaded and you will lose the entire state of the application.
The solution for the above problem is that when you refresh the page or reload the page you are saving the application state in the local storage and retrieve it after the reload and populate the reducers.
As long as the reducers are populated with the current state all the components subscribed to the store receive the data. This is what we call regydration of NGRX store.
You can define separate file which handles all the storage related activities. It has the following operations such as getting current state, get item, get item by key, save state, save item, etc.
Install the ibrary called ngrx-store-localstorage as a dependency with the this command npm install ngrx-store-localstorage --save
Once you installed this one you have to register the reducers with it so that the library automatically syncs that particular reducers with the localstorage. You don’t have to do anything explicitly.
We have initial state in each reducer as below you need to populate the initial state from storage by reading the appropriate keys
Introduction Let’s Encrypt is a Certificate Authority (CA) that provides an easy way to obtain and install free TLS/SSL certificates , thereby enabling encrypted HTTPS on web servers. It simplifies the process by providing a software client, Certbot, that attempts to automate most (if not all) of the required steps. Currently, the entire process of obtaining and installing a certificate is fully automated on both Apache and Nginx. In this tutorial, you will use Certbot to obtain a free SSL certificate for Apache on Ubuntu 18.04 and set up your certificate to renew automatically. This tutorial will use a separate Apache virtual host file instead of the default configuration file. We recommend creating new Apache virtual host files for each domain because it helps to avoid common mistakes and maintains the default files as a fallback configuration. Prerequisites To follow this tutorial, you will need: One Ubuntu 18.04 server set up by following this initial ...
1. Local Storage Events You might have already used LocalStorage, which is accessible across Tabs within the same application origin. But do you know that it also supports events? You can use this feature to communicate across Browser Tabs, where other Tabs will receive the event once the storage is updated. For example, let’s say in one Tab, we execute the following JavaScript code. window.localStorage.setItem("loggedIn", "true"); The other Tabs which listen to the event will receive it, as shown below. window.addEventListener('storage', (event) => { if (event.storageArea != localStorage) return; if (event.key === 'loggedIn') { // Do something with event.newValue } }); 2. Broadcast Channel API The Broadcast Channel API allows communication between Tabs, Windows, Frames, Iframes, and Web Workers . One Tab can create and post to a channel as follows. const channel = new BroadcastChannel('app-data'); channel.postMessage(data); And oth...
Introduction Streams are one of the major features that most Node.js applications rely on, especially when handling HTTP requests, reading/writing files, and making socket communications. Streams are very predictable since we can always expect data, error, and end events when using streams. This article will teach Node developers how to use streams to efficiently handle large amounts of data. This is a typical real-world challenge faced by Node developers when they have to deal with a large data source, and it may not be feasible to process this data all at once. This article will cover the following topics: Types of streams When to adopt Node.js streams Batching Composing streams in Node.js Transforming data with transform streams Piping streams Error handling Node.js streams Types of streams The following are four main types of streams in Node.js: Readable streams: The readable stream is responsible for reading data from a source file Writable streams: The writable stream is re...


Comments
Post a Comment