
How to Increase SSH Connection Timeout in Linux

Increase SSH Connection Timeout

On the server, head over to the /etc/ssh/sshd_config configuration file.

$ sudo vi /etc/ssh/sshd_config

Scroll and locate the following parameters:

#ClientIntervalAlive 
#ClientAliveCountMax

The ClientIntervalAlive parameter specifies the time in seconds that the server will wait before sending a null packet to the client system to keep the connection alive.

On the other hand, the ClientAliveCountMax parameter defines the number of client alive messages which are sent without getting any messages from the client. If this limit is reached while the messages are being sent, the sshd daemon will drop the session, effectively terminating the ssh session.

The timeout value is given by the product of the above parameters i.e.

Timeout value = ClientIntervalAlive * ClientAliveCountMax

For example, let’s say you have defined your parameters as shown:

ClientIntervalAlive  1200
ClientAliveCountMax 3
Increase SSH Timeout

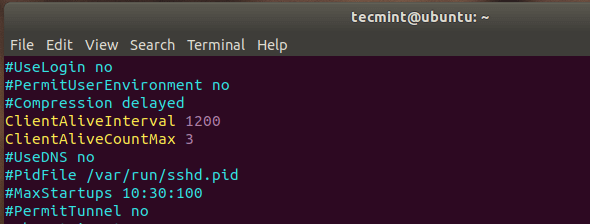
The Timeout value will be 1200 seconds * 3 = 3600 seconds. This is an equivalent of 1 hour, which implies that your ssh session will remain alive for idle time of 1 hour without dropping.

Alternatively, you can achieve the same result by specifying the ClientIntervalAlive parameter alone.

ClientIntervalAlive  3600

Once done, reload the OpenSSH daemon for the changes to come into effect.

$ sudo systemctl reload sshd
Conclusion

As an SSH security measure, it’s always advisable not to set the SSH timeout value to a huge value. This is to prevent someone from walking by and hijacking your session when you are away for an extended period of time. And that’s it for this topic.

Comments

Popular posts from this blog

4 Ways to Communicate Across Browser Tabs in Realtime

1. Local Storage Events You might have already used LocalStorage, which is accessible across Tabs within the same application origin. But do you know that it also supports events? You can use this feature to communicate across Browser Tabs, where other Tabs will receive the event once the storage is updated. For example, let’s say in one Tab, we execute the following JavaScript code. window.localStorage.setItem("loggedIn", "true"); The other Tabs which listen to the event will receive it, as shown below. window.addEventListener('storage', (event) => { if (event.storageArea != localStorage) return; if (event.key === 'loggedIn') { // Do something with event.newValue } }); 2. Broadcast Channel API The Broadcast Channel API allows communication between Tabs, Windows, Frames, Iframes, and  Web Workers . One Tab can create and post to a channel as follows. const channel = new BroadcastChannel('app-data'); channel.postMessage(data); And oth...

Working with Node.js streams

  Introduction Streams are one of the major features that most Node.js applications rely on, especially when handling HTTP requests, reading/writing files, and making socket communications. Streams are very predictable since we can always expect data, error, and end events when using streams. This article will teach Node developers how to use streams to efficiently handle large amounts of data. This is a typical real-world challenge faced by Node developers when they have to deal with a large data source, and it may not be feasible to process this data all at once. This article will cover the following topics: Types of streams When to adopt Node.js streams Batching Composing streams in Node.js Transforming data with transform streams Piping streams Error handling Node.js streams Types of streams The following are four main types of streams in Node.js: Readable streams: The readable stream is responsible for reading data from a source file Writable streams: The writable stream is re...

Certbot SSL configuration in ubuntu

  Introduction Let’s Encrypt is a Certificate Authority (CA) that provides an easy way to obtain and install free  TLS/SSL certificates , thereby enabling encrypted HTTPS on web servers. It simplifies the process by providing a software client, Certbot, that attempts to automate most (if not all) of the required steps. Currently, the entire process of obtaining and installing a certificate is fully automated on both Apache and Nginx. In this tutorial, you will use Certbot to obtain a free SSL certificate for Apache on Ubuntu 18.04 and set up your certificate to renew automatically. This tutorial will use a separate Apache virtual host file instead of the default configuration file.  We recommend  creating new Apache virtual host files for each domain because it helps to avoid common mistakes and maintains the default files as a fallback configuration. Prerequisites To follow this tutorial, you will need: One Ubuntu 18.04 server set up by following this  initial ...