How to protect your Apache server from DoS attacks (denial-of-service) using the quality of service (QoS) module on Ubuntu 16.04
There are a lot of attacks that can be performed to a server when it's not correctly configured or doesn't expect such kind of attack at all. One of the most known and easy to implement, is the Slowloris attack. This algorithm is designed so that a single machine (Linux/Unix based machine since Windows limits how many sockets you can have open at any given time) can easily tie up a typical web server or proxy server by locking up all of it's threads as they patiently wait for more data.
Some servers may have a smaller tolerance for timeouts than others, all depends of your configuration, but the algorithm can compensate for that by customizing timeouts. This kind of attack does not consume a lot of resources or bandwith at all.The load-impact is pretty low, however the http(s) services quits serving really fast. mod_qos provides you with some opportunities to scale the number of used connections on your server to defend it from the attack according to the bandwith limits. This package is available in the Ubuntu repositories so it should be pretty easy to install and configure on this environment.
In this short article, we will explain you how to install and configure the QoS module of apache in your Ubuntu 16.04 server.
1. Install mod_qos module
As first step, access your server through the terminal, update the repositories and install the module with the following command:
After installing the module, it will register and enable itself automatically. Quality of service implements control mechanisms to provide different priority to different users, applications, and data connections. It is used to guarantee a certain level of performance to data resources. The term quality of service is often used in the field of wide area network protocols (e.g. ATM) and telephony (e.g. VoIP), but rarely in conjunction with web applications. mod_qos is a quality of service module for the Apache web server implementing control mechanisms that can provide different levels of priority to different HTTP requests. Example situations where web applications require QoS:
- More resources are consumed if request processing by an application takes a long time, e.g. when request processing includes time consuming database queries.
- Oversubscription of link capabilities due to many concurrent clients uploading or downloading data.
- Penetration of the web server by attackers (DoS).
For more information about the mod_qos module of Apache, please visit the official website at SourceForge here.
For Plesk based servers
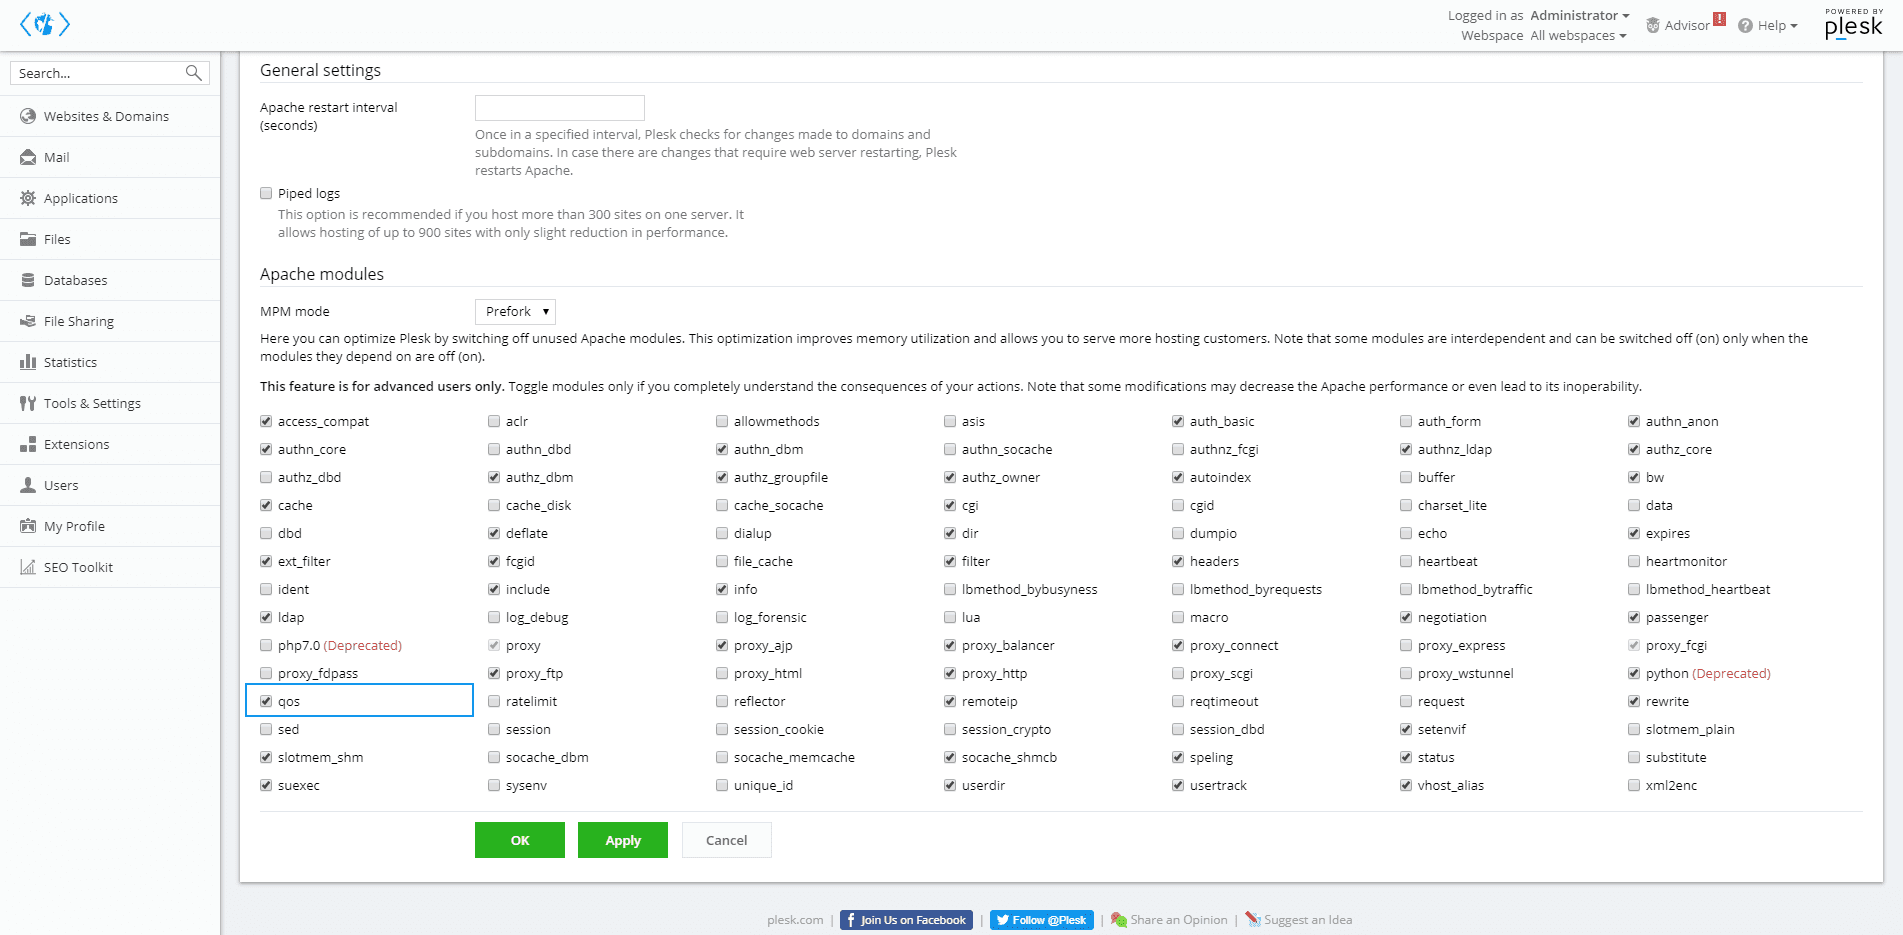
After the installation of the module through the command line, the module registers and activates itself automatically, so if you try to access the apache settings on a Plesk based server, you will see the extension on the list:

So you can enable/disable it dinamically with just a checkbox on the graphic user interface of Plesk.
2. Configure module
The installation of the module will create a configuration file that is stored in the mods-available directory of apache, you can edit it quickly with nano using:
This will open the conf file of the module on the editor, here you need to change it's content to the following one, optimize and change these values according to your needs:
To describe shortly what we are doing, is limiting the number of simultaneously inbound connections from a single IP. This will prevent automatically an user from creating more than x requests (specified at QS_SrvMaxConnPerIP) at the same time from the same device/network. This is not a problem at all when there are more than x request at the same server from real persons as long as their connection isn't working in the same way the Slowloris attack does, so if your application has access from more users than the specified at this property, they will be able to access it as long as it's not a Slow HTTP request. Wonderful, isn't !?
These may need to be adjusted depending on the characteristics of the server, e.g MaxClients may need to be an integer multiple of ThreadsPerChild. Apache 2.4 does not allow mod_qos to set QS_SrvMinDataRate. Add these or similar settings to the Apache configuration, either in a separate included file, or in the main Apache configuration file. Restart the server and verify that this approach mitigates a Slowloris attack.
Save changes to the file and restart apache using the following command:
Now, the extension should be enabled and working with the given settings. But, how can i test that it works !? Primarily, your website should be accesible in the browser, if it works, then the configuration has been set up properly. For a fully functional test, we recommend you to perform by your own a Slow HTTP attack to the configured server using any tool for this, we wrote a pretty interesting tutorial of how to run this attack on a server using SlowHTTPTest in Kali Linux and you can find it here.
Happy coding !
Comments
Post a Comment