NGRX Store is a state management library for the Angular Apps. We used to have session management on the server before single-page applications in which we maintain a session across page requests. When it comes to single-page applications, it is kind of difficult to maintain the state. It becomes easier with the NGRX store.
Let’s jump in right away and see how we can set up state management with Angular by using NGRX Store.
Here are the things we will cover in this article
- Example Project
- How it Works
- NGRX Basics
- Prerequisites
- Installation
- API Implementation
- NGRX Implementation
- Angular Implementation
- Summary
- Conclusion
Example Project
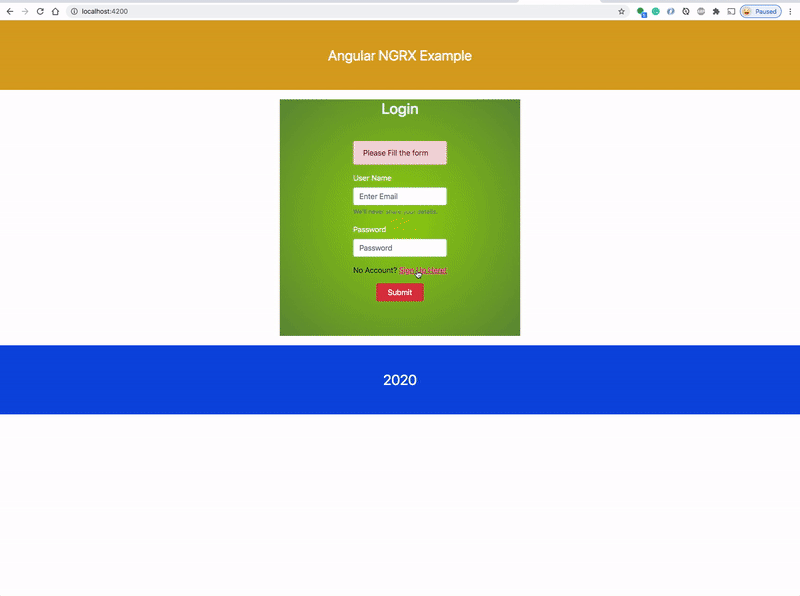
Let’s have a look at the example project. We have a simple app in which we can log in, signup, and add tasks, delete tasks, and edit tasks, etc. The entire application state is maintained with NGRX. We have actions, effects, reducers, etc. We will see all in this example.

Here is the example project in the GitHub where you can clone and run it on your local machine.
// clone the project
git clone https://github.com/bbachi/angular-ngrx-example.git// Run the API
cd api
npm install
npm run dev// Run the Angular App
cd ui
npm install
npm start
How it Works
NGRX is a state management tool inspired by redux for the Angular Applications. When your application gets bigger and bigger communication becomes difficult to handle. NGRX provides unidirectional data flow and a single source of truth for the entire app.
Components that aware of the store are called smart components and Components that aren’t aware of the store are called dumb components. If you look at the following diagram, all the smart components send the data to the store and receive data from the store promoting unidirectional data flow for the entire app.


Refreshing or reloading the page will lose the entire state of the application. That’s when localstorage comes into the picture. The whole state of the app is serialized and saved into localstorage just before the reloading the page and the entire state is deserialized from the localstorage and reinitialize the state of the app. This is called rehydrating the store.
Sometimes we have to make API calls to fetch the data for the app. Whenever the store needs data from the backend API, it uses NGRX effects to make an API call and fetch the data and update the store. We will see this in detail in further sections.
NGRX Basics
NGRX Store is inspired by Redux which provides State management for the angular applications and it is RXJS powered which boosts the performance and consistency of angular apps.
Let’s see how it works!!.


- Actions are dispatched from the components and services. These are just unique events with type and payload and can be dispatched to the store
- Reducers are the pure functions that take the latest action and current state and return the new state.
- Selectors are the pure functions that enable us to select a slice of the state.
- The State can be accessed through Store observables in components and service
- NGRX Effects are the functions that can be executed to get the new data for the state. For example, If your component needs new data from the API, the component dispatches an action, the reducers invoke the effects and services to the get the new data, reducer returns the new state with that data from API.
Prerequisites
There are some prerequisites for this article. You need to have nodejs installed on your laptop and how http works. If you want to practice and run this on your laptop you need to have these on your laptop.
This is going to be a big post if I included the whole implementation of the project. So, I created a separate post for the actual implementation of the project without the NGRX store. If you are a beginner to the Angular you can have a look at the below post. Otherwise, you can skip to the next section. This post is about step by step guide on how to develop an Angular app with NodeJS backend.
Installation
When it comes to NGRX, we need to install a bunch of libraries. Let’s install all the below libraries for the NGRX.
// install NGRX dependenciesnpm install @ngrx/{effects,entity,router-store,store,store-devtools} --savenpm install ngrx-store-freeze ngrx-store-localstorage --save
API Implementation
Let’s implement the API part of the whole application step by step. The API is built with a Nodejs and express framework. We have a login, signup, add tasks, delete tasks, edit tasks, and get tasks operations.


If you look at the above diagram, Angular with NGRX store calls the NodeJS API. Here is the file server.js which has all the operations and listens on the port 3080.
We are using nodemon in the development environment to watch any file changes and restart the server. All you need to run this command npm run devto start the nodejs server in the development mode.
Here is the demo where you start the server with the nodemon.

NGRX Implementation
Let’s implement the NGRX step by step. Here is the diagram of the NGRX structure for the application. We have actions, reducers, effects, etc.


If we look at the above diagram, The components from the Angular App invokes the NGRX Store by sending Actions. If the Actions have side effects such as calling the API, etc it will call the API through the effects. Once we receive the response from the API we change the state of the application through the reducers. The reducers here are pure functions means these take the current state and output the new state without mutating the current state.
First, we need to define the state in the Angular folder structure. I usually maintain a separate folder for the state of the application.


Login/Signup Flow
All the actions belong to the login and signup flow are defined below. Actions are the objects which have type and payload. The payload is optional here. Notice that createAction and props are imported from ngrx/store.
import { createAction, props } from '@ngrx/store';
import { User } from '../entity';

export const USER_LOGIN = '[Login Page] Login';
export const USER_LOGIN_SUCCESS = '[Login Page] Login Success';
export const USER_LOGIN_FAILURE = '[Login Page] Login Failure';

export const login = createAction(
  USER_LOGIN,
  props<{user: User}>()
);

export const loginSuccess = createAction(
  USER_LOGIN_SUCCESS,
  props<any>()
)

export const loginFailure = createAction(
  USER_LOGIN_FAILURE,
  props<{message: string}>()
)
This is the Actions file for the signup flow.
import { createAction, props } from '@ngrx/store';
import { User } from '../entity';

export const USER_SIGNUP = '[SignUp Page] Signup';
export const USER_SIGNUP_SUCCESS = '[SignUp Page] Signup Success';
export const USER_SIGNUP_FAILURE = '[SignUp Page] Signup Failure';

export const signup = createAction(
  USER_SIGNUP,
  props<{user: User}>()
);

export const signupSuccess = createAction(
  USER_SIGNUP_SUCCESS,
  props<any>()
)

export const signupFailure = createAction(
  USER_SIGNUP_FAILURE,
  props<{message: string}>()
)
Since the login and the signup actions should call the API to authenticate and register users. You need to define the effects which handle side effects.import { Injectable } from '@angular/core'; import { Actions, createEffect, ofType } from '@ngrx/effects'; import { map, exhaustMap, catchError } from 'rxjs/operators'; import { of } from 'rxjs'; import { AppService } from '../../_services/app.service'; import * as userActions from '../actions'; @Injectable() export class UserEffects { constructor( private actions$: Actions, private appService: AppService ) {} userLogin$ = createEffect(() => this.actions$.pipe( ofType(userActions.login), exhaustMap(action => this.appService.login(action.user).pipe( map(response => userActions.loginSuccess(response)), catchError((error: any) => of(userActions.loginFailure(error)))) ) ) ); userSignup$ = createEffect(() => this.actions$.pipe( ofType(userActions.signup), exhaustMap(action => this.appService.signup(action.user).pipe( map(response => userActions.signupSuccess(response)), catchError((error: any) => of(userActions.signupFailure(error)))) ) ) ); }We have defined two functions in these effects file. One is for Action of type login and another is for Action of type signup. You can see we are calling API calls and mapping the response to the appropriate Actions payload.
Here is the reducer for the user login and signup flow. If you notice the below file we have defined the initial state. For each action, we are changing the state accordingly. We are also exporting some functions which give some data that is useful for the components.
import { Action, createReducer, on } from '@ngrx/store'; import { User } from '../entity'; import * as userActions from '../actions'; import * as storage from '../state/storage'; export interface State { user: User; result: any; isLoading: boolean; isLoadingSuccess: boolean; isLoadingFailure: boolean; } export const initialState: State = { user: storage.getItem('user').user, result: '', isLoading: false, isLoadingSuccess: false, isLoadingFailure: false }; const loginReducer = createReducer( initialState, on(userActions.login, (state, {user}) => ({user, isLoading: true})), on(userActions.loginSuccess, (state, result) => ({user: result.user, result, isLoading: false, isLoadingSuccess: true})), on(userActions.signup, (state, {user}) => ({user, isLoading: true})), on(userActions.signupSuccess, (state, result) => ({user: state.user, result, isLoading: false, isLoadingSuccess: true})) ); export function reducer(state: State | undefined, action: Action): any { return loginReducer(state, action); } export const getLoggedInUser = (state: State) => { return { user: state.user, isLoadingSuccess: state.isLoadingSuccess } }; export const userLogin = (state: State) => { return { user: state.user, result: state.result, isLoading: state.isLoading, isLoadingSuccess: state.isLoadingSuccess } }; export const userSignup = (state: State) => { return { user: state.user, result: state.result, isLoading: state.isLoading, isLoadingSuccess: state.isLoadingSuccess } };Todo Tasks Flow
All the actions belong to the ToDo flow are defined below. Actions are the objects which have type and payload. The payload is optional here. Notice that createAction and props are imported from ngrx/store.
import { createAction, props } from '@ngrx/store'; import { Task } from '../entity'; export const GET_TASKS = '[Task] Get Tasks'; export const GET_TASKS_SUCCESS = '[Task] Get Tasks Success'; export const GET_TASKS_FAILURE = '[Task] Get Tasks Failure'; export const CREATE_TASK = '[Task] Create Task'; export const CREATE_TASK_SUCCESS = '[Task] Create Task Success'; export const CREATE_TASK_FAILURE = '[Task] Create Task Failure'; export const DELETE_TASK = '[Task] Delete Task'; export const DELETE_TASK_SUCCESS = '[Task] Delete Task Success'; export const DELETE_TASK_FAILURE = '[Task] Delete Task Failure'; export const EDIT_TASK = '[Task] Edit Task'; export const EDIT_TASK_SUCCESS = '[Task] Edit Task Success'; export const EDIT_TASK_FAILURE = '[Task] Edit Task Failure'; export const getTasks = createAction( GET_TASKS ); export const getTasksSuccess = createAction( GET_TASKS_SUCCESS, props<any>() ); export const getTasksFailure = createAction( GET_TASKS_FAILURE, props<{any}>() ); export const createTask = createAction( CREATE_TASK, props<{task: any}>() ); export const createTaskSuccess = createAction( CREATE_TASK_SUCCESS, props<any>() ); export const createTaskFailure = createAction( CREATE_TASK_FAILURE, props<{any}>() ); export const deleteTask = createAction( DELETE_TASK, props<{taskid}>() ); export const deleteTaskSuccess = createAction( DELETE_TASK_SUCCESS, props<any>() ); export const deleteTaskFailure = createAction( DELETE_TASK_FAILURE, props<{any}>() ); export const editTask = createAction( EDIT_TASK, props<{task: any}>() ); export const editTaskSuccess = createAction( EDIT_TASK_SUCCESS, props<any>() ); export const editTaskFailure = createAction( EDIT_TASK_FAILURE, props<{any}>() );Since the todo actions should call the API to create, delete, edit, and get tasks from the API. You need to define the effects which handle side effects.
import { Injectable } from '@angular/core'; import { Actions, createEffect, ofType } from '@ngrx/effects'; import { of } from 'rxjs'; import { map, exhaustMap, catchError } from 'rxjs/operators'; import { TodoService } from '../../_services'; import * as todoActions from '../actions'; @Injectable() export class TodoEffects { constructor( private actions$: Actions, private todoService: TodoService ) {} getTasks$ = createEffect(() => this.actions$.pipe( ofType(todoActions.getTasks), exhaustMap(action => this.todoService.getTasks().pipe( map(response => { console.log("response:::", response) return todoActions.getTasksSuccess({response}) }), catchError((error: any) => of(todoActions.getTasksFailure(error)))) ) ) ); createTask$ = createEffect(() => this.actions$.pipe( ofType(todoActions.createTask), exhaustMap(action => this.todoService.addTask(action.task).pipe( map(response => todoActions.createTaskSuccess(response)), catchError((error: any) => of(todoActions.createTaskFailure(error)))) ) ) ); deleteTask$ = createEffect(() => this.actions$.pipe( ofType(todoActions.deleteTask), exhaustMap(action => this.todoService.deleteTask(action.taskid).pipe( map(response => todoActions.deleteTaskSuccess(response)), catchError((error: any) => of(todoActions.deleteTaskFailure(error)))) ) ) ); editTask$ = createEffect(() => this.actions$.pipe( ofType(todoActions.editTask), exhaustMap(action => this.todoService.editTask(action.task).pipe( map(response => todoActions.editTaskSuccess(response)), catchError((error: any) => of(todoActions.editTaskFailure(error)))) ) ) ); }We have defined four functions in these effects file. One for each CRUD operations. You can see we are calling API calls and mapping the response to the appropriate Actions payload.
Here is the reducer for the todo flow. If you notice the below file we have defined the initial state. For each action, we are changing the state accordingly. We are also exporting some functions which give some data that is useful for the components.
import { Action, createReducer, on } from '@ngrx/store'; import { Task } from '../entity'; import * as todoActions from '../actions'; import * as _ from 'lodash' import * as storage from '../state/storage'; export interface State { tasks?: Task[]; currentTask?: Task; deleteTaskId?: any; result?: any; isLoading?: boolean; isLoadingSuccess?: boolean; isLoadingFailure?: boolean; } export const initialState: State = { tasks: storage.getItem('todo').tasks, currentTask: {}, deleteTaskId: '', result: '', isLoading: false, isLoadingSuccess: false, isLoadingFailure: false }; const todoReducer = createReducer( initialState, // GeTasks on(todoActions.getTasks, (state) => ({...state, isLoading: true})), on(todoActions.getTasksSuccess, (state, result) => ({tasks: result.response, isLoading: false, isLoadingSuccess: true})), // Create Task Reducers on(todoActions.createTask, (state, {task}) => ({...state, isLoading: true, currentTask: task})), on(todoActions.createTaskSuccess, (state, result) => { const tasks = undefined !== state.tasks ? _.cloneDeep(state.tasks) : []; const currentTask = undefined !== state.currentTask ? _.cloneDeep(state.currentTask) : {}; currentTask.id = result.taskId; tasks.push(currentTask); return { tasks, isLoading: false, isLoadingSuccess: true }; }), // Delete Task Reducers on(todoActions.deleteTask, (state, {taskid}) => ({...state, isLoading: true, deleteTaskId: taskid})), on(todoActions.deleteTaskSuccess, (state, result) => { let tasks = undefined !== state.tasks ? _.cloneDeep(state.tasks) : []; if (result.status) { tasks = tasks.filter(task => task.id !== state.deleteTaskId); } return { tasks, isLoading: false, isLoadingSuccess: true }; }), // Edit Task Reducers on(todoActions.editTask, (state, {task}) => ({...state, isLoading: true, currentTask: task})), on(todoActions.editTaskSuccess, (state, result) => { let tasks = undefined !== state.tasks ? _.cloneDeep(state.tasks) : []; const currentTask = undefined !== state.currentTask ? _.cloneDeep(state.currentTask) : {}; tasks = tasks.map(tsk => { if (tsk.id === currentTask.id) { tsk = currentTask; } return tsk; }); return { tasks, isLoading: false, isLoadingSuccess: true }; }) ); export function reducer(state: State | undefined, action: Action): any { return todoReducer(state, action); } export const getTasks = (state: State) => { return { tasks: state.tasks, isLoading: state.isLoading, isLoadingSuccess: state.isLoadingSuccess }; };Here is the complete index.ts file where you define your reducers and export functions with the help of selectors.
Here is the complete index.ts file where you define your reducers and export functions with the help of selectors.
import { ActionReducer, ActionReducerMap, createFeatureSelector, createSelector, MetaReducer } from '@ngrx/store'; import { localStorageSync } from 'ngrx-store-localstorage'; import { environment } from '../../environments/environment'; import * as fromUser from './reducers/user.reducer'; import * as fromTodo from './reducers/todo.reducer'; export interface State { user: fromUser.State; todo: fromTodo.State; } export const reducers: ActionReducerMap<State> = { user: fromUser.reducer, todo: fromTodo.reducer, }; const reducerKeys = ['user', 'todo']; export function localStorageSyncReducer(reducer: ActionReducer<any>): ActionReducer<any> { return localStorageSync({keys: reducerKeys})(reducer); } // console.log all actions export function debug(reducer: ActionReducer<any>): ActionReducer<any> { return function(state, action) { console.log('state', state); console.log('action', action); return reducer(state, action); }; } export const metaReducers: MetaReducer<State>[] = !environment.production ? [debug, localStorageSyncReducer] : [localStorageSyncReducer]; export const getLoginState = createFeatureSelector<fromUser.State>('user'); export const getLoggedInUser = createSelector( getLoginState, fromUser.getLoggedInUser ); export const userLogin = createSelector( getLoginState, fromUser.userLogin ); export const userSignup = createSelector( getLoginState, fromUser.userSignup ); // Todo reducers Begin export const geTodoState = createFeatureSelector<fromTodo.State>('todo'); export const getTasks = createSelector( geTodoState, fromTodo.getTasks );Angular Implementation
We have seen API and NGRX implementations. Its time to see how we can integrate the NGRX store in the Angular application. The first thing we need to do is import all the NGRX related code into the App module or feature module as below.
import { BrowserModule } from '@angular/platform-browser'; import { NgModule } from '@angular/core'; import { FormsModule } from '@angular/forms'; import { HttpClientModule } from '@angular/common/http'; import { BrowserAnimationsModule } from '@angular/platform-browser/animations'; import { AppRoutingModule } from './app-routing.module'; import { DashboardModule } from './dashboard/dashboard.module'; import { SharedModule } from './shared/shared.module'; import { LoginModule } from './login/login.module'; import { ModalModule } from 'ngx-bootstrap/modal'; import { AppComponent } from './app.component'; // ngrx related imports import { StoreModule } from '@ngrx/store'; import { reducers, metaReducers } from './app-state'; import { UserEffects, TodoEffects } from './app-state/effects'; import { EffectsModule } from '@ngrx/effects'; @NgModule({ declarations: [ AppComponent ], imports: [ BrowserModule, AppRoutingModule, FormsModule, BrowserAnimationsModule, HttpClientModule, DashboardModule, SharedModule, LoginModule, ModalModule.forRoot(), // ngrx related imports StoreModule.forRoot(reducers, { metaReducers }), EffectsModule.forRoot([UserEffects, TodoEffects]) ], providers: [], bootstrap: [AppComponent] }) export class AppModule { }As you can see above, we need to import effects and should be registered with the EffectsModule from the NGRX Store. Let’s see one example of how we can dispatch the actions and listens to the store changes.
Here is the login component in which we import ngrx store and actions we have defined above.
import { Component, OnInit, OnDestroy } from '@angular/core'; import { Router } from '@angular/router'; import { NgForm } from '@angular/forms'; import { Store } from '@ngrx/store'; import * as userActions from '../app-state/actions'; import * as fromRoot from '../app-state'; import { Subject } from 'rxjs'; import { takeUntil } from 'rxjs/operators'; @Component({ selector: 'app-login', templateUrl: './login.component.html', styleUrls: ['./login.component.css'] }) export class LoginComponent implements OnInit, OnDestroy { constructor(private router: Router, private readonly store: Store) { this.store.select(fromRoot.userLogin).pipe( takeUntil(this.destroy$) ).subscribe(data => { console.log('data::::', data); if (data.isLoadingSuccess && data.result.status) { this.router.navigate(['/dashboard']); } }); } model: User = new User(); destroy$: Subject<boolean> = new Subject<boolean>(); ngOnInit() { } onSubmit(loginForm: NgForm) { console.log(this.model) this.store.dispatch(userActions.login({user: { email: this.model.email, password: this.model.password }})); } ngOnDestroy(){ this.destroy$.next(true); this.destroy$.unsubscribe(); } } export class User { constructor( ) { } public email: string; public password: string; }As in the above component, we dispatch actions with this.store.dispatch and read from the store with the help of selectors such as this.store.select.
Here are the APIs which are called by NGRX effects
As in the above component, we dispatch actions with this.store.dispatch and read from the store with the help of selectors such as this.store.select.
Here are the APIs which are called by NGRX effects
import { Injectable } from '@angular/core'; import { Subject, Observable, of } from 'rxjs'; import { HttpClient, HttpHeaders } from '@angular/common/http'; import { map, catchError } from 'rxjs/operators'; @Injectable({ providedIn: 'root' }) export class AppService { private userLoggedIn = new Subject<boolean>(); loginUrl = '/api/login'; signupUrl = '/api/signup'; constructor(private http: HttpClient) { this.userLoggedIn.next(false); } setUserLoggedIn(userLoggedIn: boolean) { this.userLoggedIn.next(userLoggedIn); } getUserLoggedIn(): Observable<boolean> { return this.userLoggedIn.asObservable(); } login(user: any) { const headers = new HttpHeaders({'Content-Type' : 'application/json'}); const options = {headers}; return this.http.post(this.loginUrl, {user}, options).pipe( map((response: Response) => response), catchError(err => { console.log(err); return of([]); }) ); } signup(user: any) { const headers = new HttpHeaders({'Content-Type' : 'application/json'}); const options = {headers}; return this.http.post(this.signupUrl, {user}, options).pipe( map((response: Response) => response), catchError(err => { console.log(err); return of([]); }) ); } }import { Injectable } from '@angular/core'; import { HttpClient } from '@angular/common/http'; @Injectable({ providedIn: 'root' }) export class TodoService { constructor(private http: HttpClient) { } rootURL = '/api'; getTasks() { return this.http.get(this.rootURL + '/tasks'); } addTask(task: any) { return this.http.post(this.rootURL + '/task', {task}); } editTask(task: any) { return this.http.put(this.rootURL + '/task', {task}); } deleteTask(taskId: any) { console.log('deleting task:::', taskId); return this.http.delete(`${this.rootURL}/task/${taskId}`); } }Summary
- NGRX is a state management tool inspired by redux for the Angular Applications.
- When your application gets bigger and bigger communication becomes difficult to handle. NGRX provides unidirectional data flow and a single source of truth for the entire app.
- Components that aware of the store are called smart components and Components that aren’t aware of the store are called dumb components.
- Sometimes we have to make API calls to fetch the data for the app. Whenever the store needs data from the backend API, it uses NGRX effects to make an API call and fetch the data and update the store.
- Actions are dispatched from the components and services. These are just unique events with type and payload and can be dispatched to the store
- Reducers are the pure functions that take the latest action and current state and return the new state.
- Selectors are the pure functions that enable us to select a slice of the state.
- The State can be accessed through Store observables in components and service
- NGRX Effects are the functions that can be executed to get the new data for the state. For example, If your component needs new data from the API, the component dispatches an action, the reducers invoke the effects and services to the get the new data, reducer returns the new state with that data from API.
Comments
Post a Comment