This is a series where we learn how to set-up a powerful API with GraphQL, Koa and Mongo. The primary focus will be on GraphQL. Check out part I if you haven’t yet.
Mutations
So far we can read our data, but there’s a big chance we need to edit our data records/documents. Any complete data platform needs a way to modify server-side data as well.
Okay, imagine this– a company launched a new gadget. How would we go on about adding the record to our database with GraphQL?
Mutations to the rescue!
Think of Mutations like POST or PUT REST actions. Setting up a mutation is quite straight-forward.
Adding records to our database
Create a file graphql/mutations.js
Inside the file we will place mutations.
const { GraphQLObjectType, GraphQLObjectType } = require('graphql');
const gadgetGraphQLType =  require('./gadgetType');
const Gadget = require('./../models/gadget');

const Mutation = new GraphQLObjectType({
  name: 'Mutation',
  fields: {


  }
})

module.exports = Mutation;
- We need to import the
GraphQLObjectTypeandGraphQLObjectTypeObjects from the GraphQL library. - Import the GraphQL type for
gadget - Import the
gadgetmongoose Model.
After importing the stuff we need, we can go on about creating the mutation.
A Mutation is just a plain GraphQLObjectType like the query we had before. It has two main properties we’re interested in.
namefields
The name of the mutation is what appears in the graphiql docs.
Fields is where we can place our mutation logic.
const Mutation = new GraphQLObjectType({
  name: 'Mutation',
  fields: {
    addGadget: {
      // add props here
    }
  }
})
Notice I added a new object inside the fields object. It’s called addGadget and it would do exactly what it says it will do.
Inside the addGadget we have access to three properties, type, args, and resolve().
const Mutation = new GraphQLObjectType({
  name: 'Mutation',
  fields: {
    addGadget: {
      type: gadgetGraphQLType,
    }
  }
})
The addGadget type will be gadgetGraphQLType. The gadget can only have properties which are allowed in the gadgetGraphQLType type we declared earlier.
Addgadget is query which accepts arguments. The arguments are needed to specify which gadget we want to add to our database.
const Mutation = new GraphQLObjectType({
  name: 'Mutation',
  fields: {
    addGadget: {
      type: gadgetGraphQLType,
      args: {
        name: { type: GraphQLString },
        release_date: { type: GraphQLString },
        by_company: { type: GraphQLString },
        price: { type: GraphQLString }
      },
    }
  }
})
We declare up-front which arguments the query accepts and the types of the arguments.
Lastly–what happens with the query? Which precisely why we have the resolve()function.
Remember the resolve() function has two arguments– parent and args. We’re interested in the args since these are the values we pass to our query.
resolve(parent, args) {
  // Create a new mongo record
}
Inside the resolve we place the logic for creating a new mongo record.
const newGadget = new Gadget({
  name: <a href="http://args.name" class="link link-url" target="_blank" rel="external nofollow noopener noreferrer">args.name</a>,
  release_date: args.release_date,
  by_company: args.by_company,
  price: args.price,
})

return newGadget.save();
We create a new instance of our Gadget mongoose model, pass the props we receive from GraphQL as new fields, and finally save the record.
Here’s how the full mutation looks;
graphl/mutations.js
const { GraphQLObjectType, GraphQLString } = require('graphql');
const gadgetGraphQLType =  require('./gadgetType');
const Gadget = require('./../models/gadget');

const Mutation = new GraphQLObjectType({
  name: 'Mutation',
  fields: {
    addGadget: {
      type: gadgetGraphQLType,
      args: {
        name: { type: GraphQLString },
        release_date: { type: GraphQLString },
        by_company: { type: GraphQLString },
        price: { type: GraphQLString }
      },
      resolve(parent, args) {
        const newGadget = new Gadget({
          name: <a href="http://args.name" class="link link-url" target="_blank" rel="external nofollow noopener noreferrer">args.name</a>,
          release_date: args.release_date,
          by_company: args.by_company,
          price: args.price,
        })

        return newGadget.save();
      }
    }

  }
})

module.exports = Mutation;
Voila! All we need to do is import the mutation to our schema.js file.
graphl/schema.js
const Mutations = require('./mutations');
module.exports = new GraphQLSchema({
  query: RootQuery,
  mutation: Mutations
});
If everything went fine, this is what we should see on our graphiql.
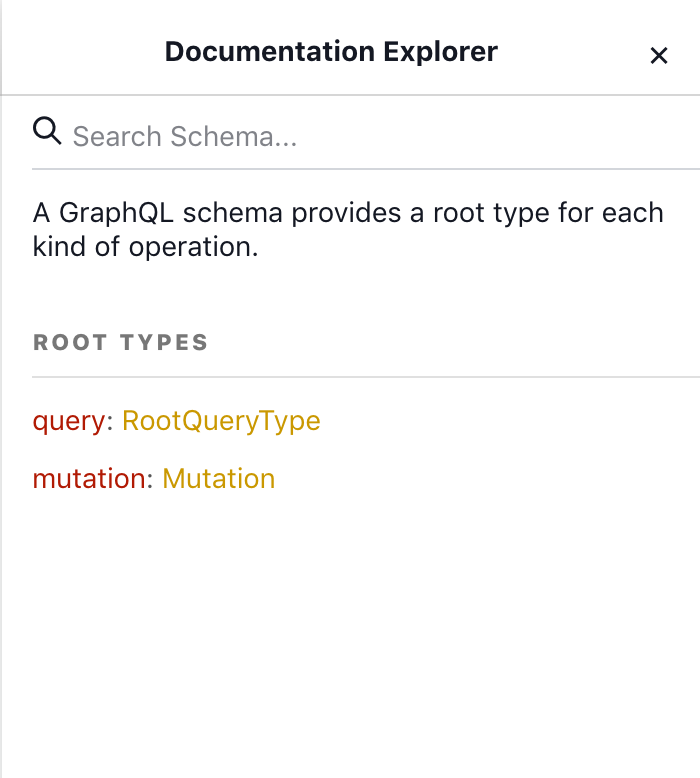
And if we click on it;

Notice how GraphQL creates automatically self-documentation. This is why we have such strong typing.
Firing off the mutation query

A mutation is just a plain graphQL query which takes our arguments, saves it to the mongo database, and returns the properties we want.
Here’s the catch;
Every mutation needs to be marked as mutation

Voila! We successfully created and inserted a new gadget to our mongo database.
If you head over to mlab or whatever provider you’re using– you should see the new record.

Here’s the complete query for our mutation.
mutation {
  addGadget(name: "MacBook Pro", release_date: "January 10, 2006", by_company: "Apple", price: "2199") {
  name,
  release_date,
  by_company,
  price
  }
}
Good job!
Editing our records in the database
What if we want to edit pre-existing records? Surely we can’t rely on never making a typo, or what if the price changes.
Editing a record is also a mutation. Remember, every time we want to change/add a new record– it’s a graphql mutation!
Open the graphql/mutations file and create another mutation. Mutation is just a plain object.
const Mutation = new GraphQLObjectType({
  name: 'Mutation',
  fields: {
    addGadget: {
      type: gadgetGraphQLType,
      args: {
        name: { type: GraphQLString },
        release_date: { type: GraphQLString },
        by_company: { type: GraphQLString },
        price: { type: GraphQLString }
      },
      resolve(parent, args) {
        const newGadget = new Gadget({
          name: <a href="http://args.name" class="link link-url" target="_blank" rel="external nofollow noopener noreferrer">args.name</a>,
          release_date: args.release_date,
          by_company: args.by_company,
          price: args.price,
        })

        return newGadget.save();
      }
    }, // add new mutation
    updateGadget: {
      type: gadgetGraphQLType,
      args: {
        id: { type: GraphQLString },
        name: { type: GraphQLString },
        release_date: { type: GraphQLString },
        by_company: { type: GraphQLString },
        price: { type: GraphQLString }
      },
      resolve(parent, args) {

      }
    }
  }
})
Notice the new mutation called updateGadget. It’s pretty much a replica of the previous mutation. Notice on extra argument, the id– That’s because we need to find the existing gadget and change it. We can find the gadget by id.
The resolve() function is where it gets more interesting. Ideally we want to find the gadget by id, change the props, and save it. How would we go on about doing this?
Mongoose gives us a method to do this, called findById.
resolve(parent, args) {
  return Gadget.findById(<a href="http://args.id" class="link link-url" target="_blank" rel="external nofollow noopener noreferrer">args.id</a>)
}
This returns a promise. If we console.log the promise, we can see a huge blob of properties attached to it. What we can do with the promise is chain it with a then()method. If promises are a stranger, check out this article I wrote.
resolve(parent, args) {
  return Gadget.findById(<a href="http://args.id" class="link link-url" target="_blank" rel="external nofollow noopener noreferrer">args.id</a>)
    .then(gadget => {
      <a href="http://gadget.name" class="link link-url" target="_blank" rel="external nofollow noopener noreferrer">gadget.name</a> = <a href="http://args.name" class="link link-url" target="_blank" rel="external nofollow noopener noreferrer">args.name</a>
      gadget.release_date = args.release_date,
      gadget.by_company = args.by_company,
      gadget.price = args.price

      return gadget.save()
    })
}
Like so; we find the Gadget, change the props, save it. But this returns another promise which we need to resolve.
resolve(parent, args) {
  return Gadget.findById(<a href="http://args.id" class="link link-url" target="_blank" rel="external nofollow noopener noreferrer">args.id</a>)
    .then(gadget => {
      <a href="http://gadget.name" class="link link-url" target="_blank" rel="external nofollow noopener noreferrer">gadget.name</a> = <a href="http://args.name" class="link link-url" target="_blank" rel="external nofollow noopener noreferrer">args.name</a>
      gadget.release_date = args.release_date,
      gadget.by_company = args.by_company,
      gadget.price = args.price
      return gadget.save()
    })
    .then(updatedGadget => updatedGadget)
    .catch(err => console.log(err))
}
.catch() for error handling incase we run into errors. Remember, you can monitor your pm2 logs via the pm2 logs command. If you run into errors, these will be logged to the pm2 logger.
That’s all! Query time! Look at your mongo table and pick a random id from there and edit the corresponding gadget.

And if we inspect the database; we should see the edited record.

Voila! Success!
Here’s the query for the updateGadget mutation.
mutation {
  updateGadget(
    id: "5c51a8f59121525ff44c41b2", name: "Macbook Pro",
    release_date: "January 10, 2006", by_company: "Apple",
    price: "9999") {
    id
    name
    release_date
    by_company
    price
  }
}
Okay, good job for making it this far. So far we have the Create, Read, Update, but we’re missing the final d(elete).
Deleting a record from a mongo database is quite straight-forward. All we need is another mutation, since we are, in fact mutating the database.
For deleting records, Mongoose gives us a handy method called findOneAndDelete– more about findOneAndDelete
removeGadget: {
  type: gadgetGraphQLType,
  args: {
    id: { type: GraphQLString }
  },
  resolve(parent, args) {
    return Gadget.findOneAndDelete(<a href="http://args.id).exec(" class="link link-url" target="_blank" rel="external nofollow noopener noreferrer">args.id).exec(</a>)
      .then(gadget => gadget.remove())
      .then(deletedGadget => deletedGadget)
      .catch(err => console.log(err))
  }
}
Deleting the record just takes one argument, the id. We find the gadget by ID, delete it, and return it. If there’s an error, we’ll log it.

And the query;
mutation {
  removeGadget(id: "5c51ae117eb446624aad1049") {
    id
    name
    release_date
    by_company
    price
  }
}
note: Make sure the id is correct and exist in the database, otherwise it won’t work.
If we head over to our database and inspect it – indeed the record got deleted from our database.
Well done, we have achieved basic CRUD functionality. Notice how GraphQL is a thin layer between our database and view. It’s not supposed to replace a database, but rather make it easier to work with data, fetching, and manipulating.
Comments
Post a Comment