
ScanSSH – Fast SSH Server And Open Proxy Scanner

ScanSSH is a free and open source utility that scans the given list of addresses or networks for open proxies, SSH protocol servers, Web and SMTP servers. It not just scans, but also displays the version of the running services. You can use it to collect statistics on the deployment of SSH protocol servers in your company or the Internet as whole. You can also use it to ensure all your machines are running the latest SSH protocol versions. The common use case of this utility could be information gathering for the pentesters and security professionals. In this guide, we will see how to install ScanSSH on various Unix-like operating systems and how to use it for gathering details of running services.

Install ScanSSH

On Arch Linux and derivatives, you can install it from AUR using any AUR helper programs such as Yay.

$ yay -S scanssh

On Fedora:

$ sudo dnf install scanssh

On DebianUbuntuLinux Mint:

$ sudo apt install scanssh

On other distributions, you can download the source from the GitHub page given at the end of this guide and manually compile and install it yourself.

ScanSSH Usage

The typical syntax of ScanSSH is:

scanssh [-VIERph] [-s scanners,...] [-n ports,...] [-u socks hosts,...] [-e excludefile] addresses...

Let us see some examples. The following command will scan for ssh servers in a network:

$ sudo scanssh -s ssh 192.168.43.0/24

ScanSSH

If you want to scan for SSH servers on port 22 only, you could use:

$ sudo scanssh -n 22 -s ssh 192.168.43.0/24

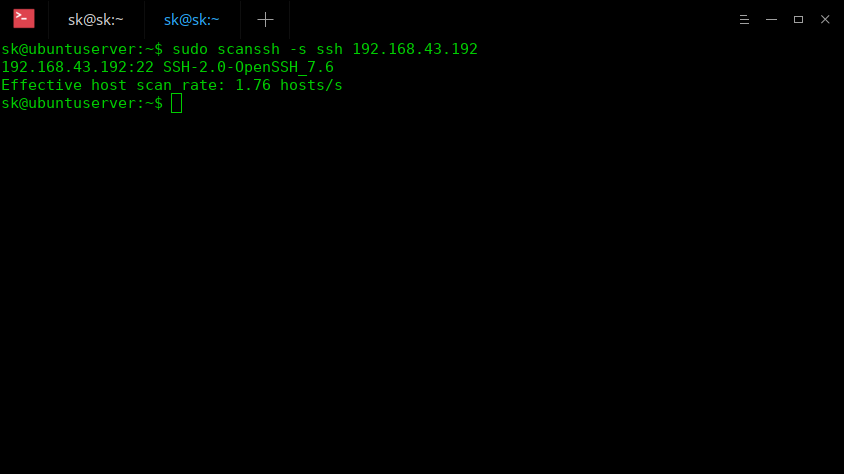
Also, you can specify only one host IP address to scan like below:

$ sudo scanssh -s ssh 192.168.43.192

And, this command will scan the given network for open proxies.

$ sudo scanssh -p 192.168.43.0/24

Here, -p flag is used for scanning open proxies.

Not just SSH and open proxies, ScanSSH will scan for the following modules.

  • socks5 – detects SOCKS v5 proxy
  • socks4 – detects SOCKS v4 proxy
  • http-proxy – detects HTTP get proxy
  • http-connect – detects HTTP connect proxy
  • telnet-proxy – detects telnet proxy

For more details, check man pages.

$ man scanssh

Comments

Popular posts from this blog

How to use Ngx-Charts in Angular ?

Charts helps us to visualize large amount of data in an easy to understand and interactive way. This helps businesses to grow more by taking important decisions from the data. For example, e-commerce can have charts or reports for product sales, with various categories like product type, year, etc. In angular, we have various charting libraries to create charts.  Ngx-charts  is one of them. Check out the list of  best angular chart libraries .  In this article, we will see data visualization with ngx-charts and how to use ngx-charts in angular application ? We will see, How to install ngx-charts in angular ? Create a vertical bar chart Create a pie chart, advanced pie chart and pie chart grid Introduction ngx-charts  is an open-source and declarative charting framework for angular2+. It is maintained by  Swimlane . It is using Angular to render and animate the SVG elements with all of its binding and speed goodness and uses d3 for the excellent math functio...

Understand Angular’s forRoot and forChild

  forRoot   /   forChild   is a pattern for singleton services that most of us know from routing. Routing is actually the main use case for it and as it is not commonly used outside of it, I wouldn’t be surprised if most Angular developers haven’t given it a second thought. However, as the official Angular documentation puts it: “Understanding how  forRoot()  works to make sure a service is a singleton will inform your development at a deeper level.” So let’s go. Providers & Injectors Angular comes with a dependency injection (DI) mechanism. When a component depends on a service, you don’t manually create an instance of the service. You  inject  the service and the dependency injection system takes care of providing an instance. import { Component, OnInit } from '@angular/core'; import { TestService } from 'src/app/services/test.service'; @Component({ selector: 'app-test', templateUrl: './test.component.html', styleUrls: ['./test.compon...

How to solve Puppeteer TimeoutError: Navigation timeout of 30000 ms exceeded

During the automation of multiple tasks on my job and personal projects, i decided to move on  Puppeteer  instead of the old school PhantomJS. One of the most usual problems with pages that contain a lot of content, because of the ads, images etc. is the load time, an exception is thrown (specifically the TimeoutError) after a page takes more than 30000ms (30 seconds) to load totally. To solve this problem, you will have 2 options, either to increase this timeout in the configuration or remove it at all. Personally, i prefer to remove the limit as i know that the pages that i work with will end up loading someday. In this article, i'll explain you briefly 2 ways to bypass this limitation. A. Globally on the tab The option that i prefer, as i browse multiple pages in the same tab, is to remove the timeout limit on the tab that i use to browse. For example, to remove the limit you should add: await page . setDefaultNavigationTimeout ( 0 ) ;  COPY SNIPPET The setDefaultNav...