ReCaptcha v2 in Angular 8 with Back-end verification with Nodejs
Angular is powerful and modern framework for secured and standard that provides almost every basic developers needs in one package, from form validators, Rxjs library, PWA integration and lots more. However, it also gives room fr integrating other API such as Recaptcha (the main concern of this article). Hence, i will be putting you through on how to integrate reCaptcha to angular (v8) and how to validate at backend with nodejs.
ReCAPTCHA is a free service that protects your website from spam and abuse, and it is always useful in registration forms and others. Alright lets hit the road.
Setting up Angular project
firstly, begin by setting up you angular project by installing the Angular CLI. to setup the environment for angular-cli please click here
if done with the process above your angular file should be up and running.
next up install the reCaptcha library using npm in CMD. inside your angular project folder run the command
npm install ng-recaptcha --save
this should install the reCaptcha API into your angular project.
Configuring the reCaptcha library for you project.
in your project folder inside the src folder, locate the index.html file and include the angular v2 script for rendering the reCaptcha widget. at the head session of the index.html file after
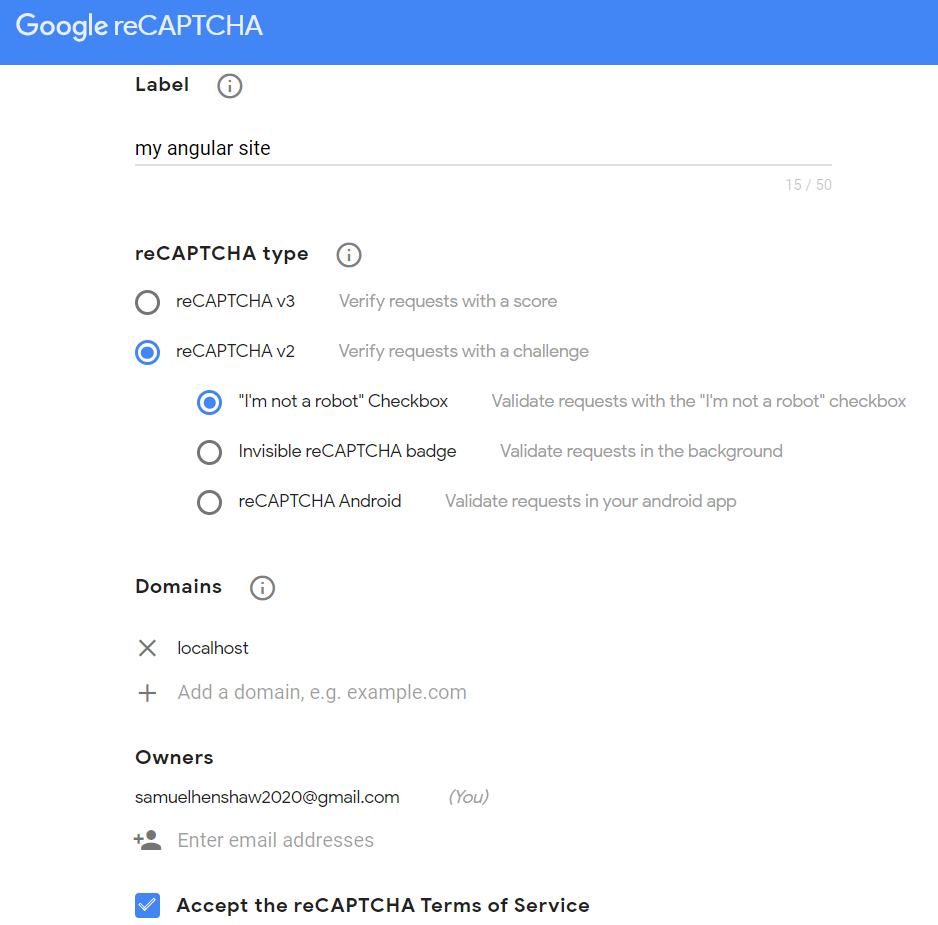
Next up, go to the google recaptcha siteto create a SITE KEY (for front end Angular) and a SECRET KEY (for backend verification with node). while in the site, click on admin console at the top right corner, then in the admin console click on the plus-like icon to register a new site. fill the form as below;
notice that the domain list contains localhost. this is for development purpose. when done click on the Submit button to create
Next, click the settings-like icon to get your site key for your angular part
your site key and secret key should look like
copy the site key.
Including the Site key and rendering the reCaptcha interface
navigate to your app.module.ts file and include the imports for reCaptcha
import { RecaptchaModule, RecaptchaFormsModule } from 'ng-recaptcha';

@NgModule({
  declarations: [
    AppComponent,
  ],
  imports: [
    BrowserModule,
    AppRoutingModule,
    HttpClientModule,
    ReactiveFormsModule,
    FormsModule,
    BrowserAnimationsModule,

    RecaptchaModule,  //this is the recaptcha main module
    RecaptchaFormsModule, //this is the module for form incase form validation
  ],
  entryComponents:[],
  providers: [ ],
  bootstrap: [AppComponent]
})
export class AppModule {}
Remember we included the reCaptcha script before in our app/src/index.html file to render the reCaptcha interface.
Lets assume we are using the app/src/app.component.html file. to show the reCaptcha interface include the code in any *.component.html file you want to use it. in my case i am using the app.component.html file
<div>
<!--
the SITE_KEY is the sitekey from your admin console.
use form control for validation
-->
<re-captcha (resolved)="resolved($event)"
formControlName="recaptchaReactive"
siteKey="SITE_KEY">
</re-captcha>
</div>
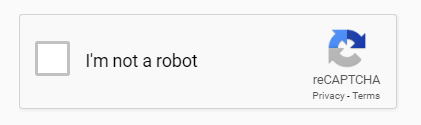
Bravo! we are almost there. Now check if your reCaptcha interface shows. load the page after ng serve
if it shows, you are configured correctly.
Resolving the I-am-not-a-robot interface and retrieving a token for backend validation
The recaptcha api actually checks for site abuse, and it does that with validating a user by retrieving a token which is then used for further validation at the backend. this is called resolving.
before resolving, notice the app-recaptcha we included to render our recaptcha interface
this is the event that binds to the resolved function in the component.ts file . hence, to complete it, we need to include the resolved($event) function in app.component.ts.
with this, when the reCaptcha is checkbox is clicked and checked, the resolved function gets called and the response is a token. the response will lok like this
If this is attained then congratulation you have finally resolved the reCaptcha. however, to complete the circle, we have to validate the token received at the backend with our recaptcha site secret key.
for this case we will use nodejs.
Setting up Nodejs Express backend and Validating token
to settup the node backend create a folder where you want to place your node backend. use the command
mkdir app-backend cd app-backend
After words initialize your app with
npm init
the command will require for certain things from you like description. for (endpoint): index.js, you can us app.js or anything
up next install the express and other necessary dependencies in app-backend folder created earlier
npm install express request body-parser --save
the above command should install express server, request module for making http request to other endpoint and body-parser module for parsing json.
Validating the token
to validate the token angular needs to send the token to the node backend. to do that use the Angular HttpClient API. however, you need to proxy the backend to avoid CORS restriction. to do that.
Proxy the node back end
create a proxy.conf.json file at the root folder of your angular application (i.e angular project folder). in the folder include;
save and close file. stop the running angular project and re-run the project with
npm start
this should run your project, and proxy to your node backend.
Send token to backend
in angular HTTP processes are handled using angular service. to create a service use
ng generate service app
this will generate an app.service.ts file in app/src folder
include the HttpClientModule in your app.module.ts to use the HttpClient API
if done, create a simple post request in your service to an end point: token_validate. below is a app.service.ts file (angular service to send the token) and app.component.ts file to use the service to send the resolved token
import { AppService} from "./app.service";
@Component({
selector: 'app-root',
templateUrl: './app.component.html',
styleUrls: ['./app.component.css']
})
export class AppComponent{
constructor(private service: AppService){
}
//function to resolve the reCaptcha and retrieve a token
async resolved(captchaResponse: string, res) {
console.log(`Resolved response token: ${captchaResponse}`);
await sendTokenToBackend(capchaResponse); //declaring the token send function with a token parameter
}
//function to send the token to the node server
sendTokenToBackend(tok){
//calling the service and passing the token to the service
this.service.sendToken(tok).subscribe(
data => {
console.log(data)
},
err => {
console.log(err)
},
() => {}
);
}
}
import { Injectable } from '@angular/core';
import {HttpClient } from '@angular/common/http'
import { Observable } from 'rxjs';
@Injectable({
providedIn: 'root'
})
export class AppService {
constructor(
private http: HttpClient
) { }
sendToken(token){
return this.http.post<any>("/token_validate", {recaptcha: token})
}
}
Receiving and validating the token with node server
At the backend, we created a node file but we have not run it yet to listen on a port 3000. validate the token the following code gist showcases how to receive the token and validate it.
const express = require('express')
const bodyParser = require("body-parser");
const request = require("request");
const app = express();
const port = 3000;
app.use(bodyParser.json());
app.use(bodyParser.urlencoded({ extended: true }));
app.post('/token_validate', (req, res)=>{
let token = req.body.recaptcha;
const secretkey = "SECRET_KEY"; //the secret key from your google admin console;
//token validation url is URL: https://www.google.com/recaptcha/api/siteverify
// METHOD used is: POST
const url = `https://www.google.com/recaptcha/api/siteverify?secret=${secretKey}&response=${token}&remoteip=${req.connection.remoteAddress}`
//note that remoteip is the users ip address and it is optional
// in node req.connection.remoteAddress gives the users ip address
if(token === null || token === undefined){
res.status(201).send({success: false, message: "Token is empty or invalid"})
return console.log("token empty");
}
request(url, function(err, response, body){
//the body is the data that contains success message
body = JSON.parse(body);
//check if the validation failed
if(body.success !== undefined && !data.success){
res.send({success: false, 'message': "recaptcha failed"});
return console.log("failed")
}
//if passed response success message to client
res.send({"success": true, 'message': "recaptcha passed"});
})
})
app.listen(port, ()=>{
console.log(`connected on port ${port}`)
})
If all is good, run the node server. navigate into the node backend (app-backend) folder using CMD and use the command
node index
this will kick-off your node server. note, the index implies that index.js is your end point. if app.js or server.js use node app or node server.
Introduction Let’s Encrypt is a Certificate Authority (CA) that provides an easy way to obtain and install free TLS/SSL certificates , thereby enabling encrypted HTTPS on web servers. It simplifies the process by providing a software client, Certbot, that attempts to automate most (if not all) of the required steps. Currently, the entire process of obtaining and installing a certificate is fully automated on both Apache and Nginx. In this tutorial, you will use Certbot to obtain a free SSL certificate for Apache on Ubuntu 18.04 and set up your certificate to renew automatically. This tutorial will use a separate Apache virtual host file instead of the default configuration file. We recommend creating new Apache virtual host files for each domain because it helps to avoid common mistakes and maintains the default files as a fallback configuration. Prerequisites To follow this tutorial, you will need: One Ubuntu 18.04 server set up by following this initial ...
1. Local Storage Events You might have already used LocalStorage, which is accessible across Tabs within the same application origin. But do you know that it also supports events? You can use this feature to communicate across Browser Tabs, where other Tabs will receive the event once the storage is updated. For example, let’s say in one Tab, we execute the following JavaScript code. window.localStorage.setItem("loggedIn", "true"); The other Tabs which listen to the event will receive it, as shown below. window.addEventListener('storage', (event) => { if (event.storageArea != localStorage) return; if (event.key === 'loggedIn') { // Do something with event.newValue } }); 2. Broadcast Channel API The Broadcast Channel API allows communication between Tabs, Windows, Frames, Iframes, and Web Workers . One Tab can create and post to a channel as follows. const channel = new BroadcastChannel('app-data'); channel.postMessage(data); And oth...
Introduction Streams are one of the major features that most Node.js applications rely on, especially when handling HTTP requests, reading/writing files, and making socket communications. Streams are very predictable since we can always expect data, error, and end events when using streams. This article will teach Node developers how to use streams to efficiently handle large amounts of data. This is a typical real-world challenge faced by Node developers when they have to deal with a large data source, and it may not be feasible to process this data all at once. This article will cover the following topics: Types of streams When to adopt Node.js streams Batching Composing streams in Node.js Transforming data with transform streams Piping streams Error handling Node.js streams Types of streams The following are four main types of streams in Node.js: Readable streams: The readable stream is responsible for reading data from a source file Writable streams: The writable stream is re...


Comments
Post a Comment