
How To Detect Online Connectivity in Angular Application

We will create a small and easy Angular application to check if user is connected to Internet or not with the use of Angular Material.

Create a Snackbar to check whether a user is online or offline in Angular in a minute! A small and easy Angular application to check if user is connected to Internet or not with use of Angular material

First of all you have to install a packaged called ng-connection-service. Lets see how do we do that.

Create new Angular application using CLI

_ng new Online_

Install the ng-connection-service package inside the application from the CLI using:

_npm install ng-connection-service — save_

Once if you done this process please check your package.json whether it is added or not

You should see something like below,
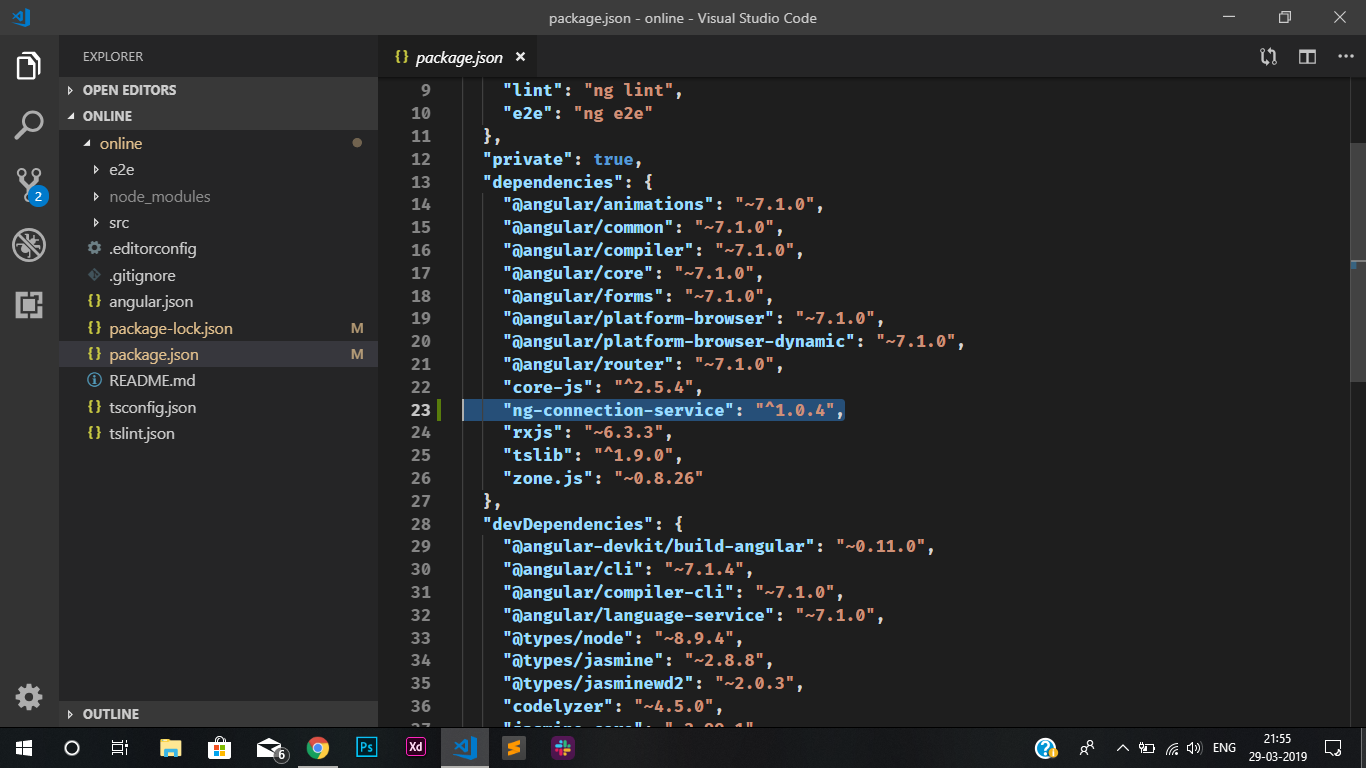
package.json

now, time to install Angular Material into your project using CLI

npm install — save @angular/material @angular/cdk @angular/animations

now, import it in app.component.ts like below:

import {MatSnackBar,MatSnackBarConfig,MatSnackBarHorizontalPosition,MatSnackBarVerticalPosition} from ‘@angular/material’;

Let us finally inject the service inside the component. If you are familiar with service, you’d know that to inject a service, we go to the constructor of the component class and inject it as follows:

constructor(private connectionService: ConnectionService, public snackbar: MatSnackBar){
});

now the time for write logic of checking the internet connectivity. See the code below:
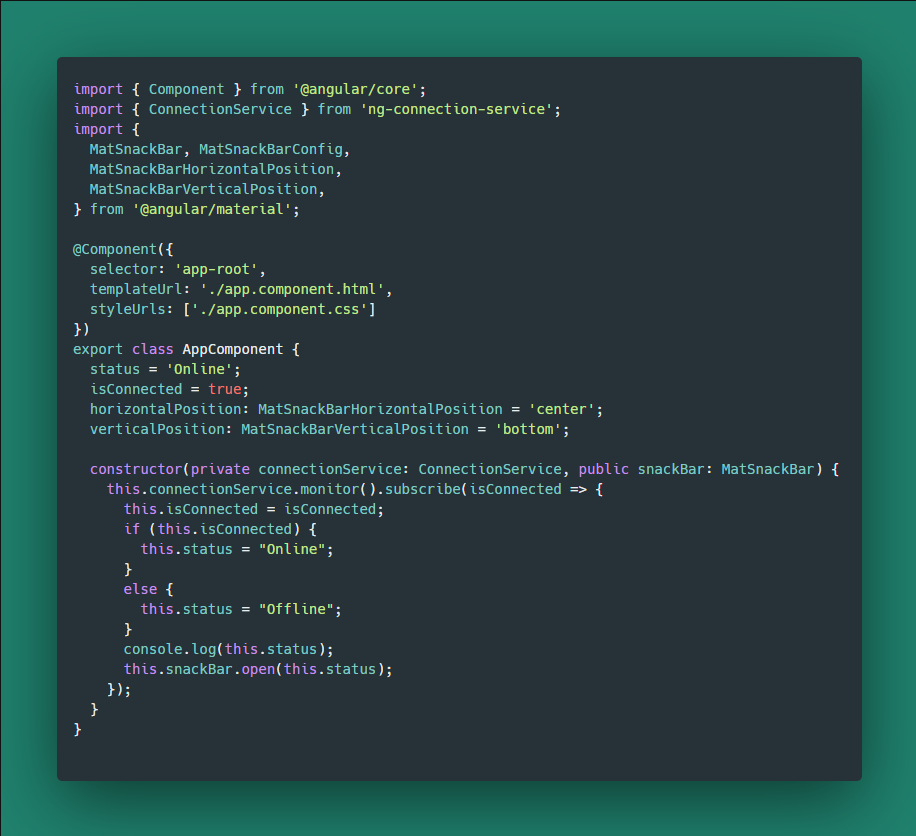
app.component.ts

Final result look like:

final output

Conclusion

Here you can see whenever I turned off my wifi connection Snackbar pop up in bottom and show OFFLINE Status. Thus in this article we have learnt how we can detect internet connection status in an Angular Application. Thank you for reading!

Comments

Popular posts from this blog

4 Ways to Communicate Across Browser Tabs in Realtime

1. Local Storage Events You might have already used LocalStorage, which is accessible across Tabs within the same application origin. But do you know that it also supports events? You can use this feature to communicate across Browser Tabs, where other Tabs will receive the event once the storage is updated. For example, let’s say in one Tab, we execute the following JavaScript code. window.localStorage.setItem("loggedIn", "true"); The other Tabs which listen to the event will receive it, as shown below. window.addEventListener('storage', (event) => { if (event.storageArea != localStorage) return; if (event.key === 'loggedIn') { // Do something with event.newValue } }); 2. Broadcast Channel API The Broadcast Channel API allows communication between Tabs, Windows, Frames, Iframes, and  Web Workers . One Tab can create and post to a channel as follows. const channel = new BroadcastChannel('app-data'); channel.postMessage(data); And oth...

Certbot SSL configuration in ubuntu

  Introduction Let’s Encrypt is a Certificate Authority (CA) that provides an easy way to obtain and install free  TLS/SSL certificates , thereby enabling encrypted HTTPS on web servers. It simplifies the process by providing a software client, Certbot, that attempts to automate most (if not all) of the required steps. Currently, the entire process of obtaining and installing a certificate is fully automated on both Apache and Nginx. In this tutorial, you will use Certbot to obtain a free SSL certificate for Apache on Ubuntu 18.04 and set up your certificate to renew automatically. This tutorial will use a separate Apache virtual host file instead of the default configuration file.  We recommend  creating new Apache virtual host files for each domain because it helps to avoid common mistakes and maintains the default files as a fallback configuration. Prerequisites To follow this tutorial, you will need: One Ubuntu 18.04 server set up by following this  initial ...

Working with Node.js streams

  Introduction Streams are one of the major features that most Node.js applications rely on, especially when handling HTTP requests, reading/writing files, and making socket communications. Streams are very predictable since we can always expect data, error, and end events when using streams. This article will teach Node developers how to use streams to efficiently handle large amounts of data. This is a typical real-world challenge faced by Node developers when they have to deal with a large data source, and it may not be feasible to process this data all at once. This article will cover the following topics: Types of streams When to adopt Node.js streams Batching Composing streams in Node.js Transforming data with transform streams Piping streams Error handling Node.js streams Types of streams The following are four main types of streams in Node.js: Readable streams: The readable stream is responsible for reading data from a source file Writable streams: The writable stream is re...