Prerequisites
- Docker installed on your server and local machine
- An Ubuntu server, you can get one from DigitalOcean
- Basic understanding of git
- Basic understanding of the command line interface
In this step, you will be creating a simple Deno application to display hello world. Unlike NodeJS, you do not need to run npm initto create a new application. You can simply create a TypeScript file and start coding away.
To begin, create a new directory named deno-deploy on your local machine, by running:
mkdir deno-deployChange directory to deno-deploy by running:
cd deno-deployCreate a new file named server.ts within the deno-deploydirectory by running:
touch server.tsNote: alternatively, you could use your favourite editor to create this file.
Open server.ts with your preferred editor and paste and save the following code snippet:
import { serve } from "https://deno.land/std@0.53.0/http/server.ts";

const server = serve({ port: 8000 });

console.log("Now serving on port 8000 ");

for await (const req of server) {
    req.respond({ body: "Hello World"});
}
");
for await (const req of server) {
req.respond({ body: "Hello World"});
}The snippet above will create a Deno server and serves the content Hello World on port 8000.
Create a Docker configuration
Create a Dockerfile
In this step, you will set up the Docker configuration for your Deno application. First, you will create a new file named Dockerfile via the terminal by running:
touch DockerfileOpen Dockerfile with your preferred text editor then paste and save the following snippet:
FROM hayd/deno:latest

EXPOSE 8000

WORKDIR /app

ADD . /app

RUN deno cache server.ts

CMD ["run", "--allow-net", "server.ts"]
Let’s break down what these lines in our Dockerfile will do when executed:
FROM hayd/deno:latest
Pulls the latest version of hayd/deno image from Docker hub.
EXPOSE 8000
Exposes port 8000 on our container when built.
WORKDIR /app
Makes the working directory /app in our container.
ADD . /app
Copies the content of the root directory into /app directory in your Docker container.
RUN deno cache server.ts
Compiles server.ts so that it doesn’t need to be compiled for each startup.
CMD [“run”, “–allow-net”, “server.ts”]
This will run the server.ts file and enables networking.
Create docker-compose.yml
In this step, you will be creating a docker-compose.yml file that will be used to piece everything together and serve our application. To create a docker-compose.yml file, run:
touch docker-compose.ymlOpen docker-compose.yml with your preferred text editor then paste and save the following snippet:
version: '3'

services:
  web:
    build: .
    container_name: deno-deploy
    ports:
      - "8000:8000"
Let us break down what these lines in our docker-compose.ymlwill do when executed. version: '3' specifies the version of YAML contained in the file:
web:
    build: .
    container_name: deno-deploy
    ports:
      - "8000:8000"
This section contains the web service.
build: .
This indicates that the Dockerfile we intend to build is in the current directory.
container_name: deno-deploy
This will ensure that the container name on the build will be deno-deploy.
ports: - "3000:3000"
Will map the container port 8000 to the host server port 8000.
Build and run the container
To build your Docker container locally, run:
docker-compose up
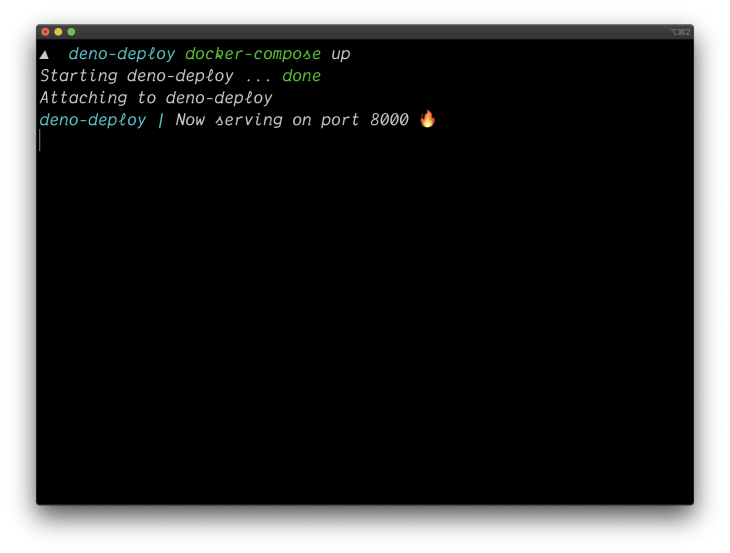
You can visit your application on http://localhost:8000 via your preferred web browser.

Deploy to production
Push to GitHub
Docker makes it easy to quickly deploy applications anywhere. First, you will need to make your code available on git version control, a good provider is GitHub. Create a new repository named deno-deploy.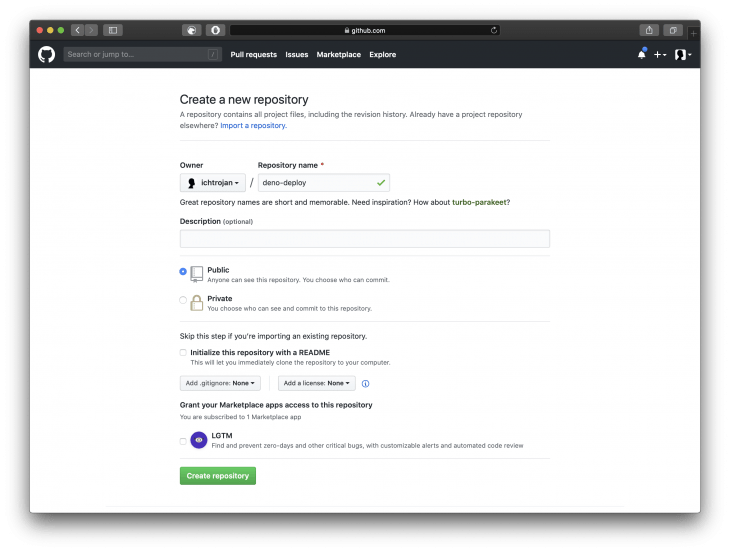

Open the terminal, while still in the deno-deploy directory. Run:
git initThis will initiate a new git repository. Next, stage all files by running:
git add .Commit the staged files with the commit message "deno deploy":
git commit -m "deno deploy"Push to the master branch by running:
git push -u origin masterThis will push the codebase along with the Docker configuration to the master branch of your Github repository.
Deploy on the server
In this step, you will be making your source code available on the server and making it accessible via the internet.
SSH into your server:
ssh {SERVER_USER}@{SERVER_IP}SERVER_USERis the user of the server
SERVER_IPis the IP address of the server
Clone the repository:
git clone https://github.com/{GITHUB_USERNAME}/deno-deploy.gitNote:
GITHUB_USERNAMEis your actual GitHub username
Change directory into the cloned repository:
cd deno-deployExecute the docker-compose command:
docker-compose up -d
Unlike how you executed docker-compose on your local machine, there is a -d flag which enables your docker container to run in detached mode. In simpler terms, it allows your docker container to run in the background.
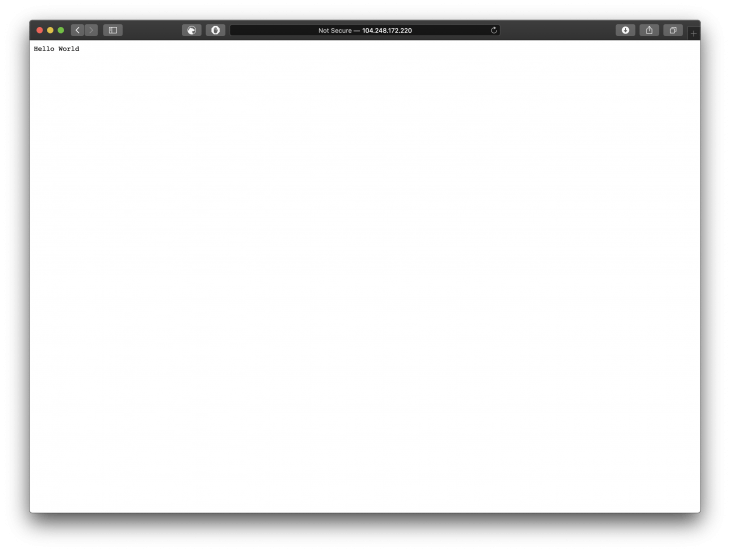
You will be able to visit your application on http://{SERVER_IP}:8000. In my case, you can visit http://104.248.172.220:8000.
Conclusion
In this article, we learned how to create a simple Deno web server, how to create a Docker configuration for a Deno web server, how to push your code to GitHub, and how to make your Deno application available on the internet. Happy coding!
Comments
Post a Comment