this series, we're working on a serverless stack using AWS.
In this part, I'll show how to serve a static website through an S3 Bucket and how to deploy from your local machine.
First of all, go ahead and log in or create a new account if you don't have one yet.
For that go to https://aws.amazon.com/.
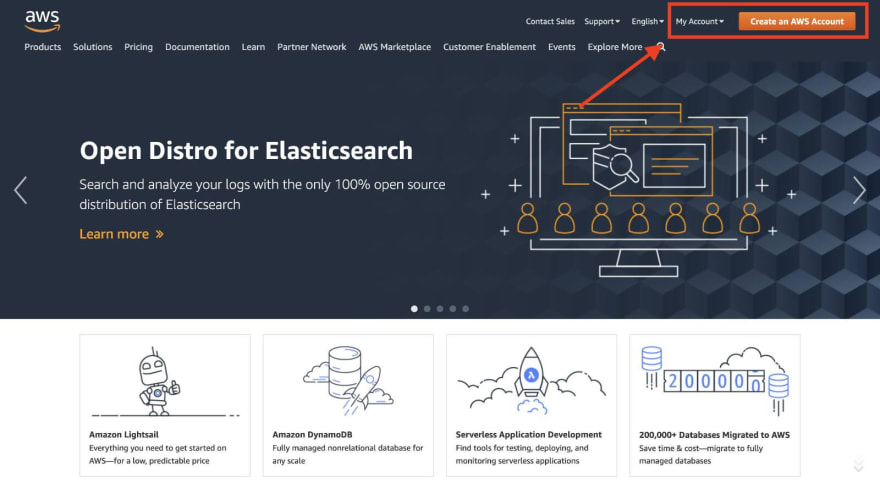
Afterward, go to the Management Console if you're not already there.
Select S3 from the services menu in the top left.

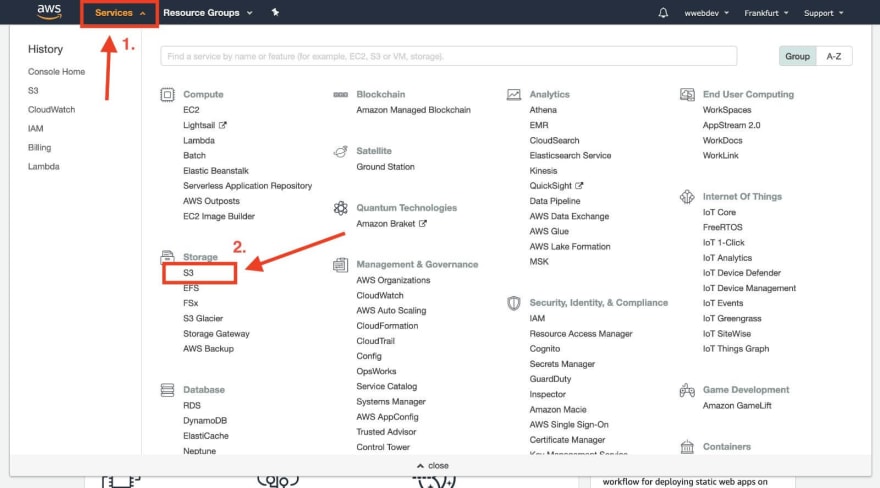
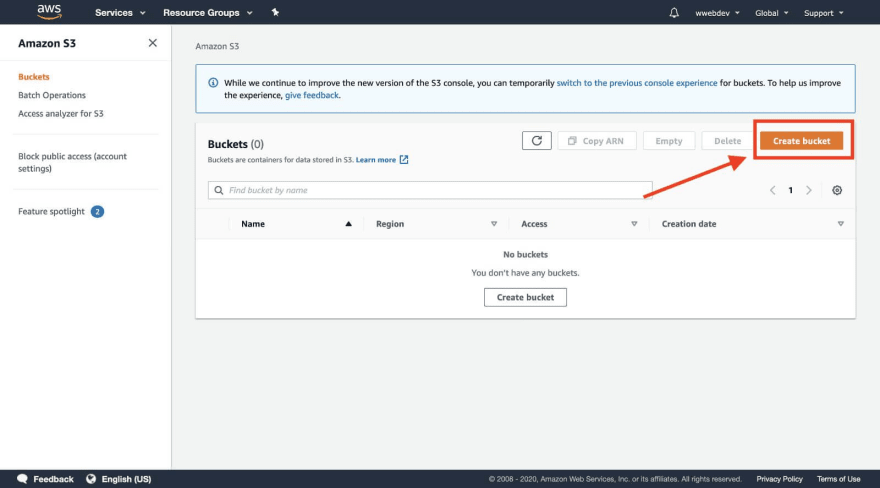
Now you should see the S3 bucket overview. S3 stands for "simple storage service", and is a service that lets you store data.
Go ahead and click Create bucket.
Now choose a name for your bucket. For the region, choose the one near you.
We'll learn how to decrease the latency for people who are not living near your region using CloudFront in the next part of this series.
As we want to serve a static website from the bucket, it needs to be public.
So uncheck the box for "Block all public access" and remove the checks, which are not related to the ACLs.

Click Create Bucket. Afterward, you'll see an overview of all your buckets.
Open the newly created one and go to the Tabs Permissions -> Bucket Policy. Then enter the following code and replace your-bucket-name with the name of your bucket. Then hit save.
    {
        "Version": "2012-10-17",
        "Statement": [
            {
                "Sid": "PublicReadForGetBucketObjects",
                "Effect": "Allow",
                "Principal": "*",
                "Action": [
                    "s3:GetObject"
                ],
                "Resource": [
                    "arn:aws:s3:::your-bucket-name/*"
                ]
            }
        ]
    }

This will allow public access to your bucket.
Now we need to enable static web hosting. For this go to the tab Properties and click the Box Static website hosting. There you only need to specify the index document.
I will use index.html for that, as this will be the entry point for my website.
You can also specify below, which page will be shown when errors occur.

If you now click on the endpoint of your bucket, you'll see a 404 Not Found error. This is because we haven't uploaded our index.html file yet.
I'll use the following file to verify that everything is working.
    <!DOCTYPE html>
    <html>
      <head>
        <meta charset="UTF-8">
        <title>S3 Website</title>
      </head>
      <body>
        This website is served from S3!
      </body>
    </html>
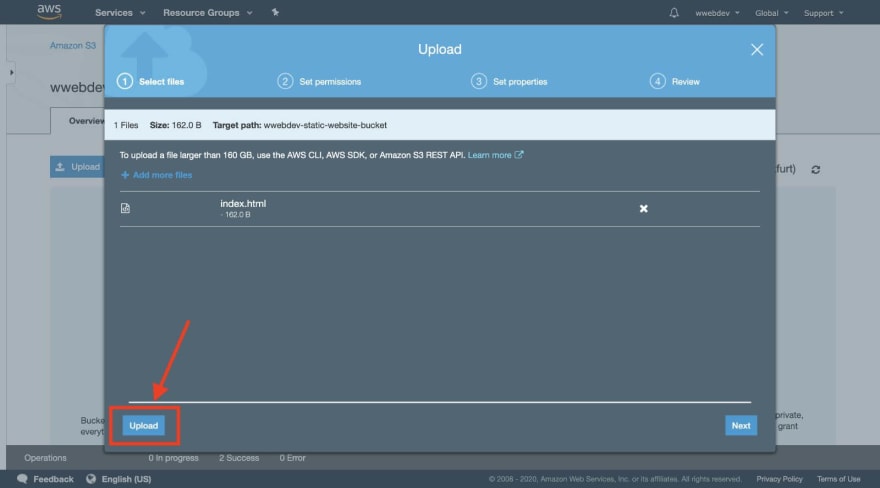
So let's go back to the "Overview" Tab and click "Upload".

Select your file and click upload on the bottom left.
There is no need to change the permissions and properties for this file, as the defaults are fine.
Now you should be able to see the content of your index.html when you open the link of your bucket.
If you don't have the link anymore, you can click the index.html in the overview and it will show you the "Object URL".

Setting up IAM and Deploying to S3 from your CLI
First, you need to get an Access key ID and Secret access key to get programmatic access to your AWS account.
For that go back to your management console and go to the service IAM.

Amazon IAM (Identity and Access Management) is used to manage users and their permissions.
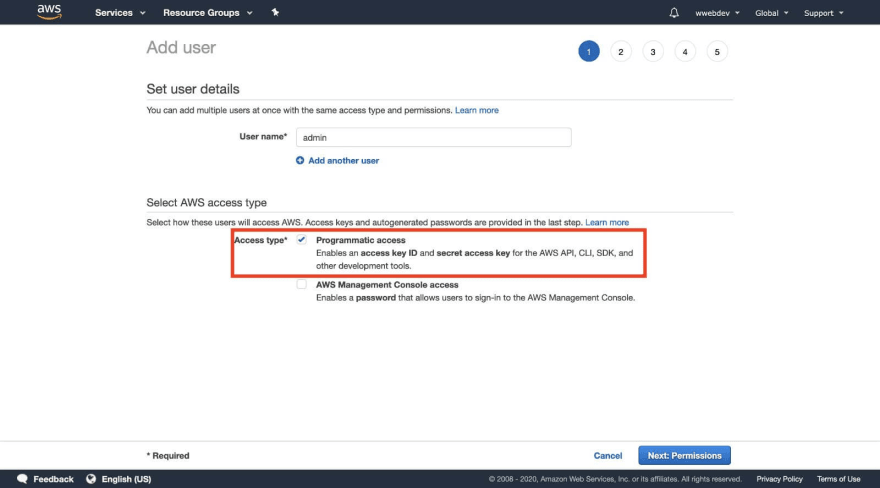
Click on Users in the left menu and then on Add user

We want to create a user, which is able to do everything - so I call it admin. Set the check for Programmatic access.
Afterward, click Next: Permissions.
As a next step, we need to grant that user the required permissions.
So go to Attach existing policies directly and select AdministratorAccess.
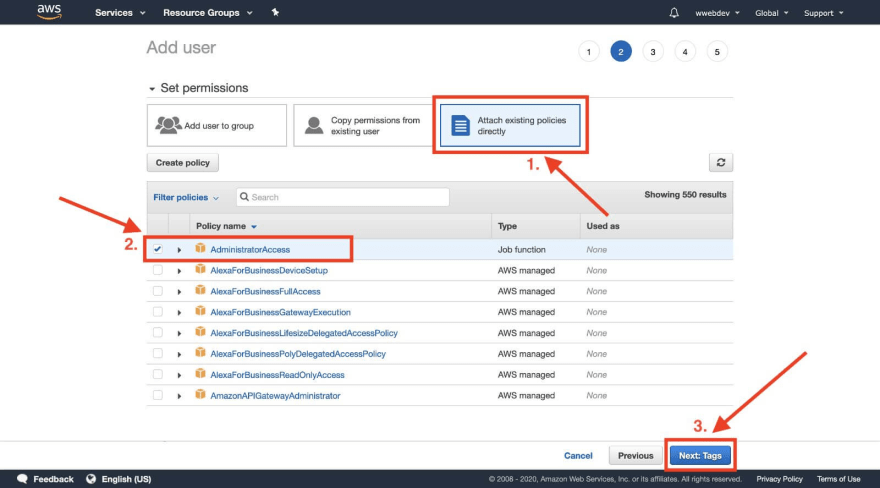
You can skip the next tag of setting tags and straight create the user.
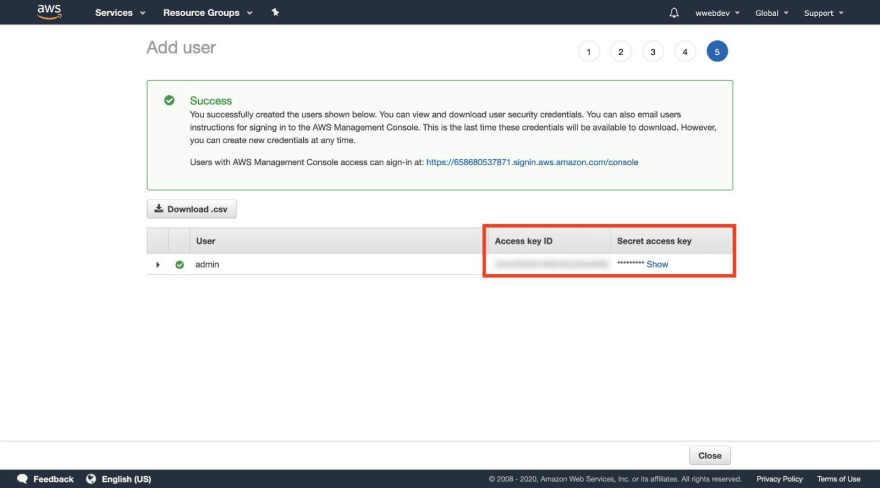
In the last step, you'll see your Access key ID and Secret access key.
Note them somewhere or keep this page open.
To deploy via CLI you need to install the aws-shell. Go to their repository and follow the installment instructions:
https://github.com/awslabs/aws-shell
After the installation, type
aws configure
It will ask you for your access key and your secret. Use the ones we've just created.
You can leave the Default region name and the Default output format blank.
Now you should be able to deploy to S3 via command line. In your console, navigate to the directory where your files are. To upload your files type:
aws s3 sync ./ s3://your_bucket_name
Where ./ is the path and your_bucket_name is the name of your bucket.
Now you should see a success message for all the files that have been uploaded in the console. The files should be available in your bucket.
For uploading websites through the aws s3 sync command it makes sense to add the --delete argument. This will delete all files on s3, which are not in your source directory.
For example, I'd use the following command to upload the export of a next.js app.
aws s3 sync ./out s3://your_bucket_name --delete
Congratulations you now know how to serve a website to S3 and how to upload to an S3 bucket with the aws-shell.
In the next part of this series, we will distribute our S3 bucket through Cloudfront and add a domain
Comments
Post a Comment