Introduction
In this article, we will learn about validations in reactive forms in Angular. We will create a simple user registration form and implement some inbuilt validations on it. Along with the inbuilt validations, we will also implement some custom validations to the reactive form.
We will consider the following custom validations for this demo:
- Check for user name availability
- Password pattern validation
- Match the password entered in two different fields
Take a look at the application in action.
Prerequisites
Source Code
Get the source code from GitHub.
Create the Angular app
Navigate to the folder where you want to create your project file. Open a command window and run the command shown below:
ng new angular-forms-validation --routing=false --style=scssWe are specifying the command to create a new Angular application. The option to create the routing module is set to false and the style files extension is set to scss. This command will create the Angular project with the name angular-forms-validation.
Change directories to the new project and open the project in VS Code using the set of command shown below:
cd angular-forms-validation
code .
Install Bootstrap
Run the following command to install the Bootstrap library:
npm install bootstrap --saveAdd the following import definition in the styles.scss file:
@import "~bootstrap/dist/css/bootstrap.css";Create the validation service
Run the following command to create a new service:
ng g s services\customvalidationThis command will create a folder named services that has two files in it – customvalidation.service.ts and customvalidation.service.spec.ts. Open the customvalidation.service.ts file and put the following code in it:
import { Injectable } from '@angular/core';
import { ValidatorFn, AbstractControl } from '@angular/forms';
import { FormGroup } from '@angular/forms';

@Injectable({
  providedIn: 'root'
})
export class CustomvalidationService {

  patternValidator(): ValidatorFn {
    return (control: AbstractControl): { [key: string]: any } => {
      if (!control.value) {
        return null;
      }
      const regex = new RegExp('^(?=.*?[A-Z])(?=.*?[a-z])(?=.*?[0-9]).{8,}$');
      const valid = regex.test(control.value);
      return valid ? null : { invalidPassword: true };
    };
  }

  MatchPassword(password: string, confirmPassword: string) {
    return (formGroup: FormGroup) => {
      const passwordControl = formGroup.controls[password];
      const confirmPasswordControl = formGroup.controls[confirmPassword];

      if (!passwordControl || !confirmPasswordControl) {
        return null;
      }

      if (confirmPasswordControl.errors && !confirmPasswordControl.errors.passwordMismatch) {
        return null;
      }

      if (passwordControl.value !== confirmPasswordControl.value) {
        confirmPasswordControl.setErrors({ passwordMismatch: true });
      } else {
        confirmPasswordControl.setErrors(null);
      }
    }
  }

  userNameValidator(userControl: AbstractControl) {
    return new Promise(resolve => {
      setTimeout(() => {
        if (this.validateUserName(userControl.value)) {
          resolve({ userNameNotAvailable: true });
        } else {
          resolve(null);
        }
      }, 1000);
    });
  }

  validateUserName(userName: string) {
    const UserList = ['ankit', 'admin', 'user', 'superuser'];
    return (UserList.indexOf(userName) > -1);
  }
}
The method patternValidator is used to validate the password pattern in our form. The parameter for this method is of type AbstractControl which is a base class for the FormControl.
We will use a regular expression to validate the password. We will validate the following four conditions using the regular expression:
- The password should be a minimum of eight characters long.
- It has at least one lower case letter.
- It has at least one upper case letter.
- It has at least one number.
If the password fails the regex check, we will set the invalidPassword property to true.
The method MatchPassword is used to compare the passwords in two fields. This method will accept two parameters of type string. These parameters represent the name of the fields to be matched. We will get the FormControl for these two fields and then match the values in them. If the values do not match, we will set the passwordMismatch property to true.
The method userNameValidator is used to verify whether the username is already taken or not. This method will accept a parameter of type AbstractControl. We will check if the value of this field is present in a static array, UserList. If the value entered by the user is already present, we will set the userNameNotAvailable property to true.
We are using the setTimeout function to invoke this check every two seconds. This will ensure that the error will be thrown after two seconds from the time the user stops typing in the field.
For the sake of simplicity of this article, we are using a static array to search for the availability of user names. Ideally, it should be a service call to the server to search the value in a database.
Create the reactive form component
Run the following command to create the reactive-form component:
ng g c reactive-formOpen reactive-form.component.ts and put the following code in it:
import { Component, OnInit } from '@angular/core';
import { Validators, FormGroup, FormBuilder } from '@angular/forms';
import { CustomvalidationService } from '../services/customvalidation.service';

@Component({
  selector: 'app-reactive-form',
  templateUrl: './reactive-form.component.html',
  styleUrls: ['./reactive-form.component.scss']
})
export class ReactiveFormComponent implements OnInit {

  registerForm: FormGroup;
  submitted = false;

  constructor(
    private fb: FormBuilder,
    private customValidator: CustomvalidationService
  ) { }

  ngOnInit() {
    this.registerForm = this.fb.group({
      name: ['', Validators.required],
      email: ['', [Validators.required, Validators.email]],
      username: ['', [Validators.required], this.customValidator.userNameValidator.bind(this.customValidator)],
      password: ['', Validators.compose([Validators.required, this.customValidator.patternValidator()])],
      confirmPassword: ['', [Validators.required]],
    },
      {
        validator: this.customValidator.MatchPassword('password', 'confirmPassword'),
      }
    );
  }

  get registerFormControl() {
    return this.registerForm.controls;
  }

  onSubmit() {
    this.submitted = true;
    if (this.registerForm.valid) {
      alert('Form Submitted succesfully!!!\n Check the values in browser console.');
      console.table(this.registerForm.value);
    }
  }
}
We will create a variable registerForm of type FormGroup. In the ngOnInitmethod, we will set the controls for the form using the FormBuilder class. All the fields are set as a required field for this form. We will invoke the userNameValidator method of the service using the bind function.
For the password field, we will use the compose method to merge in multiple validators into a single function. We will also invoke the MatchPassword method and pass the name of the password and confirmPassword form controls as parameters.
The registerFormControl property will return the form controls of the form. The onSubmit method will print the content of the form on the console if the form is valid and submitted successfully.
Open reactive-form.component.html and put the following code in it:
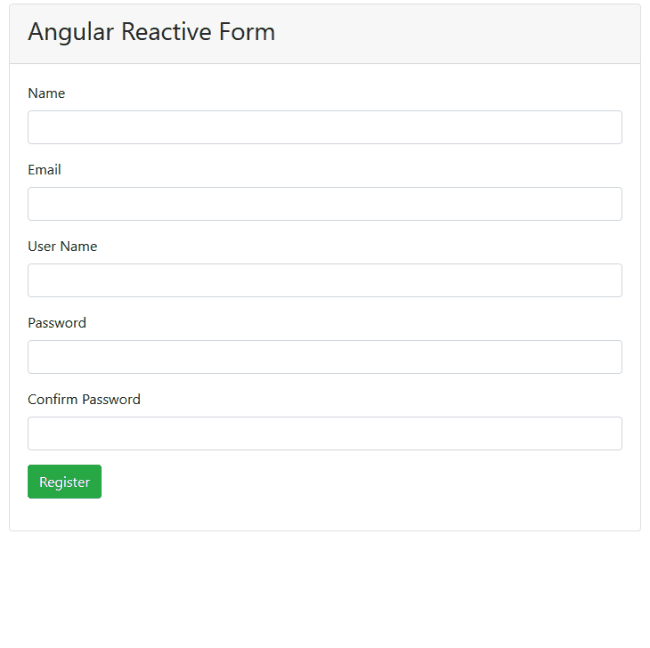
<div class="container">
    <div class="row">
        <div class="col-md-8 mx-auto">
            <div class="card">
                <div class="card-header">
                    <h3>Angular Reactive Form</h3>
                </div>
                <div class="card-body">
                    <form class="form" [formGroup]="registerForm" (ngSubmit)="onSubmit()">
                        <div class="form-group">
                            <label>Name</label>
                            <input type="text" class="form-control" formControlName="name">
                            <span class="text-danger"
                                *ngIf="(registerFormControl.name.touched || submitted) && registerFormControl.name.errors?.required">
                                Name is required
                            </span>
                        </div>
                        <div class="form-group">
                            <label>Email</label>
                            <input type="text" class="form-control" formControlName="email">
                            <span class="text-danger"
                                *ngIf="(registerFormControl.email.touched || submitted) && registerFormControl.email.errors?.required">
                                Email is required
                            </span>
                            <span class="text-danger"
                                *ngIf="registerFormControl.email.touched && registerFormControl.email.errors?.email">
                                Enter a valid email address
                            </span>
                        </div>
                        <div class="form-group">
                            <label>User Name</label>
                            <input type="text" class="form-control" formControlName="username">
                            <span class="text-danger"
                                *ngIf="(registerFormControl.username.touched || submitted) && registerFormControl.username.errors?.required">
                                User Name is required
                            </span>
                            <span class="text-danger"
                                *ngIf="registerFormControl.username.touched && registerFormControl.username.errors?.userNameNotAvailable">
                                User Name is not available
                            </span>
                        </div>
                        <div class="form-group">
                            <label>Password</label>
                            <input type="password" class="form-control" formControlName="password">
                            <span class="text-danger"
                                *ngIf="(registerFormControl.password.touched || submitted) && registerFormControl.password.errors?.required">
                                Password is required
                            </span>
                            <span class="text-danger"
                                *ngIf="registerFormControl.password.touched && registerFormControl.password.errors?.invalidPassword">
                                Password should have minimum 8 characters, at least 1 uppercase letter, 1 lowercase
                                letter and 1 number
                            </span>
                        </div>
                        <div class="form-group">
                            <label>Confirm Password</label>
                            <input type="password" class="form-control" formControlName="confirmPassword">
                            <span class="text-danger"
                                *ngIf="(registerFormControl.confirmPassword.touched || submitted)&& registerFormControl.confirmPassword.errors?.required">
                                Confirm Password is required
                            </span>
                            <span class="text-danger"
                                *ngIf="registerFormControl.confirmPassword.touched && registerFormControl.confirmPassword.errors?.passwordMismatch">
                                Passwords doesnot match
                            </span>
                        </div>
                        <div class="form-group">
                            <button type="submit" class="btn btn-success">Register</button>
                        </div>
                    </form>
                </div>
            </div>
        </div>
    </div>
</div>
We will create a reactive form and use the Bootstrap card for styling. The card header will contain a title whereas the card body will have the form fields. We will bind the formGroup property of the <form> tag to the name of our form which is registerForm. The onSubmit method will be invoked on submitting the form. We will also bind the formControlName property of each input field to the control name of our FormGroup. We will check for errors in the form controls and then display the appropriate validation error message on the screen.
Create the nav-bar component
Run the following command to create the nav-bar component:
ng g c nav-barOpen nav-bar.component.html and put the following code in it:
<nav class="navbar navbar-expand-sm navbar-dark bg-dark fixed-top">
    <a class="navbar-brand" [routerLink]='["/"]'>Form Validation Demo</a>
    <div class="collapse navbar-collapse">
        <ul class="navbar-nav mr-auto">
            <li class="nav-item">
                <a class="nav-link" [routerLink]='["/reactive-form"]'>Reactive Form</a>
            </li>
        </ul>
    </div>
</nav>
We are adding the navigation link to the reactive form component in the nav bar.
Update the app component
Open the app.component.html file and put the following code in it:
<app-nav-bar></app-nav-bar>
<div class="container">
  <router-outlet></router-outlet>
</div>
Update the App module
Add the following code in the app.module.ts file. We will import the forms module and define the routing for our application. You can refer to GitHub for the complete source code of this file.
import { RouterModule } from '@angular/router';
import { ReactiveFormsModule } from  '@angular/forms';

@NgModule({
  ...
  imports: [
    ...
    ReactiveFormsModule,
    RouterModule.forRoot([
      { path: '', component: ReactiveFormComponent },
      { path: 'reactive-form', component: ReactiveFormComponent }
    ]),
  ],
})
Execution demo
We will use the following command to start the web server:
ng serve -oThis command will launch the application in your default browser at http://localhost:4200/. You can perform all the form validations which we have discussed here.
Comments
Post a Comment