Introduction
This article explains Server Clusters in NodeJS. A cluster consists of two or more computers working together to provide availability, reliability and scalability that could be obtained using a single computer. In a server cluster, each server owns and manages its local devices and applications or services that the cluster is managing.
Cluster Object
A single instance of Node runs in a single thread. The cluster module allows you to create child processes that all share server ports. When you call server.listen() in a worker, it serializes the argument and passes the request to the master process. If the master process already has a listening server matching the worker's requirement, then it passes the handle to the server.
If it does not already have a listening server matching that requirement then it will create one and pass the handle to the worker.
Cluster.isMaster
Cluster.isMaster returns the Boolean value true if the process is the master. The main server.js file uses this module to fire the cluster of workers then those workers can do any TCP/HTTP/HTTPS/TLS server that would work. If the process master is true then it is determined by the process.env.NODE_UNIQUE_ID. The cluster master provides a Read-Eval-Print-Loop (REPL) into the master process so you can inspect the state of your cluster.
Cluster.Fork
This creates a new worker process. Only the master process may call this method to expose a map of key-value pairs to the child process environment.
Cluster Events
- fork
- online
- listening
- disconnect
fork: the fork event is fired when the master attempts to fork a new child; it receives a worker object.
online: the online event is fired when the master receives a notification that the child is fully bound; it receives a worker object.
listening: when the worker performs an action that requires a listen() call such as HTTP server. The event emits two arguments the first one is a worker object and address object containing the address, port and address type value of the connection.
disconnect: called whenever a child is disconnected from the cluster; that can happen either through process exit event.
Now let's see how to use a cluster object in Node.js. Use the following procedure to do that.
Step 1
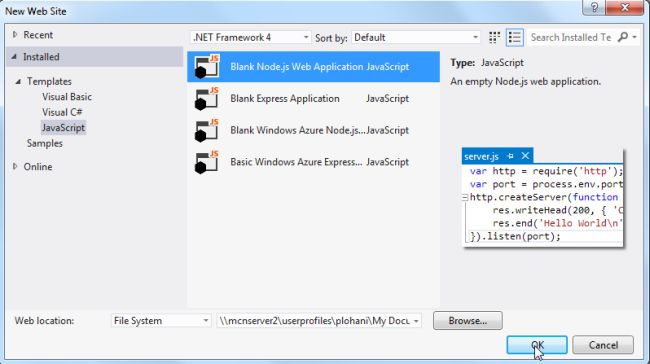
To create the new Node Web Application open Visual Studio then select "File" --> "New Web Site" then select "Node Web Application" as in the following figure

Step 2
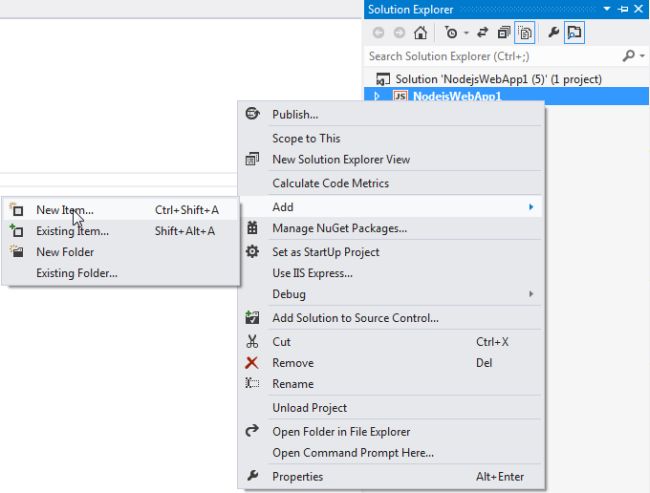
Add a new Script file from the Solution Explorer as in the following figure

Step 3
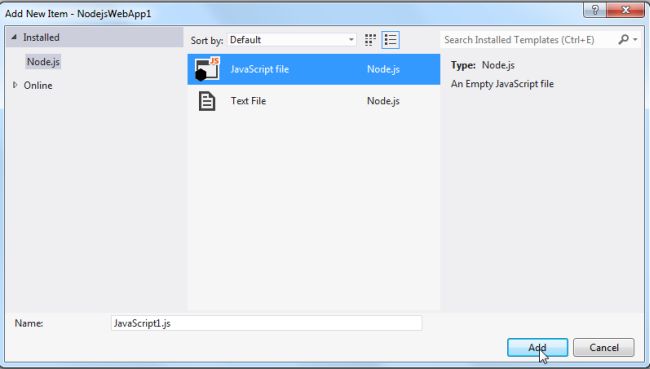
Now select the new JavaScript file as in the following figure

Now write the following code in a JavaScript File.
Step 4
(function () {
    '';
    var cls = require('cluster'),
        http = require('http'),
        os = require('os'),
        ClsServer = {
            clusname: 'ClusterServer',
            cpus: os.cpus().length,
            autoRestart: true,
            start: function (server, port) {
                var me = this,
                    i;
                if (cls.isMaster) {
                    for (i = 0; i < me.cpus; i += 1) {
                        console.log(me.name + ': starting worker thread #' + i);
                        cls.fork();
                    }
                    /*cls.on('death', function (worker) {
                        console.log(me.clusname + ': worker ' + worker.pid + ' died.');
                        if (me.autoRestart) {
                            console.log(me.clusname + ':thread restart');
                            cls.fork();
                        }
                    });*/
                } else {
                    server.listen(port);
                }
            }
        }
        helloWorldServer = http.createServer(function (request, response) {
            response.writeHead(200, {
                'Content-type': 'text/plain'
            });
            response.end('Hello World!');
        });
    ClsServer.name = 'hello World Server';
    ClsServer.start(helloWorldServer, 8081);
}());
In the above example, we create a ClusterServer object to start multi-threaded server instances by passing the server object to ClusterServer.start(server, port). Servers are automatically started with a number of threads equivalent to the numbers of CPUs reported by the os module.
Step 5
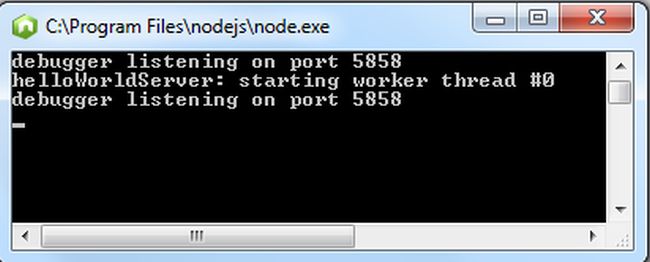
Debug the application by pressing F5 and the output will be shown in a console application as in the following figure

Thanks for reading!
Comments
Post a Comment