Nowadays, when creating even basic websites, programmers are obligated to use modern features and technologies. Even such basic project as creating simple portfolio for your friend may involve some problems, like receiving data from contact form.
There is plenty of ways to read those data. You can connect your form with the database (f.e Firebase), and then read incoming messages from it. Well, it is an option, but I assume that it might be troublesome for your not-tech client.
There is plenty of ways to read those data. You can connect your form with the database (f.e Firebase), and then read incoming messages from it. Well, it is an option, but I assume that it might be troublesome for your not-tech client.
Why don‘t you do your job with sending email?
Yes, it‘s definitely the best option, which is the most user-friendly. Your clients will be very much happier, when they will receive incoming messages without using the database. But here comes the issue – How to implement that? Well, you may think that you need to use kind of back-end language.

Not at all! You don‘t have to use any of backend languages like php or python. Furthermore, you don‘t need even node.js!
Everything you need is a simple EmailJS library
In this article I will show you how to:
- configure emailjs account
- send email with the use of JS
Note, that in my project I have used gulp and webpack, thanks to what I write code in src file and serve it from dist.
I will show you in 5 steps, how to build an email sender from scratch.
Step 1 – Create your form in HTML
The very first thing that is required is of course creating a HTML form. Note, that you don‘t have to put validate attributes like required or max, because later on, the preventDefault() function will be run on your submit event and it will cancel working those attributes.
The most important thing in your form is to put the
name attribute for each of inputs. They will be necessary later.
My very simple form looks like that:
src/html/index.html
  <form class="form">
        <input name='name' type="text" placeholder="Your name..." class="form__input" />
        <input name='topic' type="text" placeholder="Topic..." class="form__input"  />
        <textarea name='message' type="text" placeholder="Your Message..." class="form__input"  ></textarea>

        <input type="submit" value="send" class="form__input form__input--button">
    </form>
Step 2 – Sign up to emailjs
To configure your emails, you have to sign up to emailjs service. Don‘t worry – working with this website is very friendly and you won‘t spend lot of time on it.
After login, you will be asked about your email service.It is placed in the
personal email service zone. In my case, I have picked the gmail.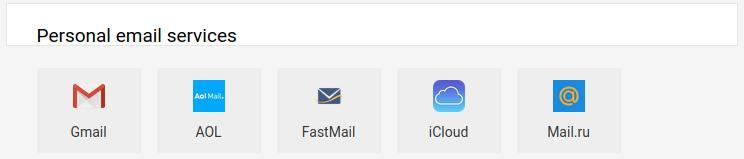
Then, you will have to connect your gmail account. It will be your email, which will be used to sending emails to you/your client. So for example, if you connect your xyz@gmail.com account, your future incoming emails will be sent from exactly this account. So don‘t worry about asking gmail for sending emails on your behalf – this is exactly what you need!

After connecting gmail account, click
add service button.Step 3 – Create your mail template
If you have connected your gmail account successfully, you should be now in your dashboard. And this is the time for creating your email template.
Go to the email templates card and click
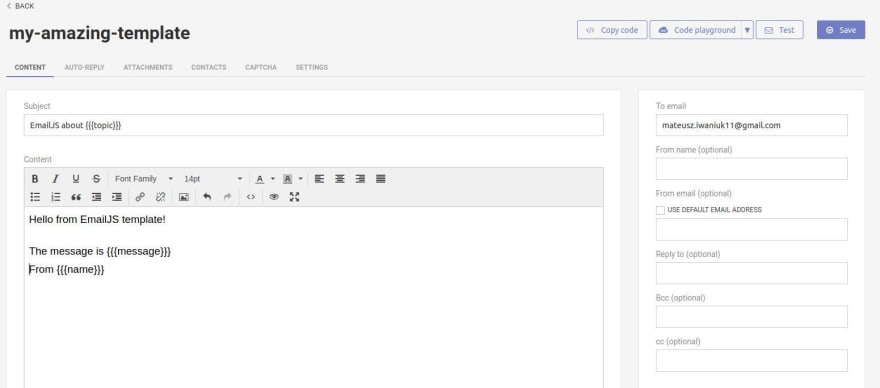
You can select name and ID of your template. I have called it ,,my-amazing-template".
create a new template. The interface is very friendly, so you won‘t have any problems with creating it.You can select name and ID of your template. I have called it ,,my-amazing-template".

You have to now specify, how incoming email should look like.
The values that will be used, are coming from
The values that will be used, are coming from
name attribute in input. You have insert your variable into {{{ }}} signs.
Don‘t forget to place an email address in
To email section (on the right side). It as an address, to which your emails will be sent. In this case - this is my business email.
This is my simple template which uses each of 3 variables, that come from my HTML form. I have also specified a subject of incoming email.
Step 4 – Save your API keys.
Well, there is nothing special in this part. Emailjs shares authorization API keys that will be used during sending email. Of course, the best place to put these keys is
.env config. But because of the fact, that I am working with simple static files and I don‘t want to work with server configuration, I will save them in the apikeys file and later will import them.- Your USER_ID is located in the Account > API Keys.

- And your TEMPLATE_ID is below the title of your template.
This is my example config based on not-existing keys
src/js/apikeys.js
src/js/apikeys.js
export default {
    USER_ID :'user_DPUd-rest-of-my-id',
    TEMPLATE_ID:'my_amazing_template'
}
DO NOT FORGET TO ADD APIKEYS FILE TO .GITIGNORE WHEN DEPLOYING TO GITHUB
Step 5 – Send email!
It‘s time for the last and most important part of the project. Now we have to send email with the use of javascript.
At first, you have to download emailjs package.
npm i emails-com
After that, go to your js file and import your library and apikeys.
src/js/main.js
import emailjs from 'emailjs-com'
import apiKeys from './apikeys'
Now it‘s time to write a sending email function.
src/js/main.js
src/js/main.js
const sendEmail = e => {
    e.preventDefault()

    emailjs
    .sendForm('gmail', apiKeys.TEMPLATE_ID, e.target, apiKeys.USER_ID)
    .then(
      result => {
        console.log(result.text)
      },
      error => {
        console.log(error.text)
      }
    )
}
It is so simple;
As you could see, sendForm function takes 4 parametres:
As you could see, sendForm function takes 4 parametres:
- id of your email, which is located here:

- TEMPLATE_ID coming from your apikey file,
- event object from your form submitting
- USER_ID coming from your apikey file,
And at the end, find the form and add the submit listener.
src/js/main.js
src/js/main.js
const form = document.querySelector('.form')
form.addEventListener('submit',sendEmail)
As i mentioned earlier, because of
preventDefault() function, your attribute validation will not work. You have to do validation and clearing inputs on your own with the use of JS.
And that‘s all – let us test that.
I‘m filling up the form on my page and sending it.

I receive my email, which was passed during the template creating.


And indeed, all values coming from inputs are in the right place.
I receive my email, which was passed during the template creating.
And indeed, all values coming from inputs are in the right place.
Conclusion
As could be seen, sending emails in JS is not so hard thing. With the emailjs you can send email messages in the easy way. I‘m sure that your future clients will be happy about incoming mails from forms located on their webpage.
Comments
Post a Comment