In this article, we'll cover some best practices to create HTTP requests just using the Angular AsyncPipe. If you ever thought about making HTTP requests without calling .subscribe(), then you're on the right page.
The async pipe subscribes to an Observable or Promise and returns the latest value it has emitted. When a new value is emitted, the async pipe marks the component to be checked for changes. When the component gets destroyed, the async pipe unsubscribes automatically to avoid potential memory leaks.
The most important part here is "when the component gets destroyed, the async pipe unsubscribes automatically to avoid potential memory leaks." These being said, we don't have to worry about unsubscribing the Observables, the AsyncPipe will take care for of it us - good practice (and the most important).
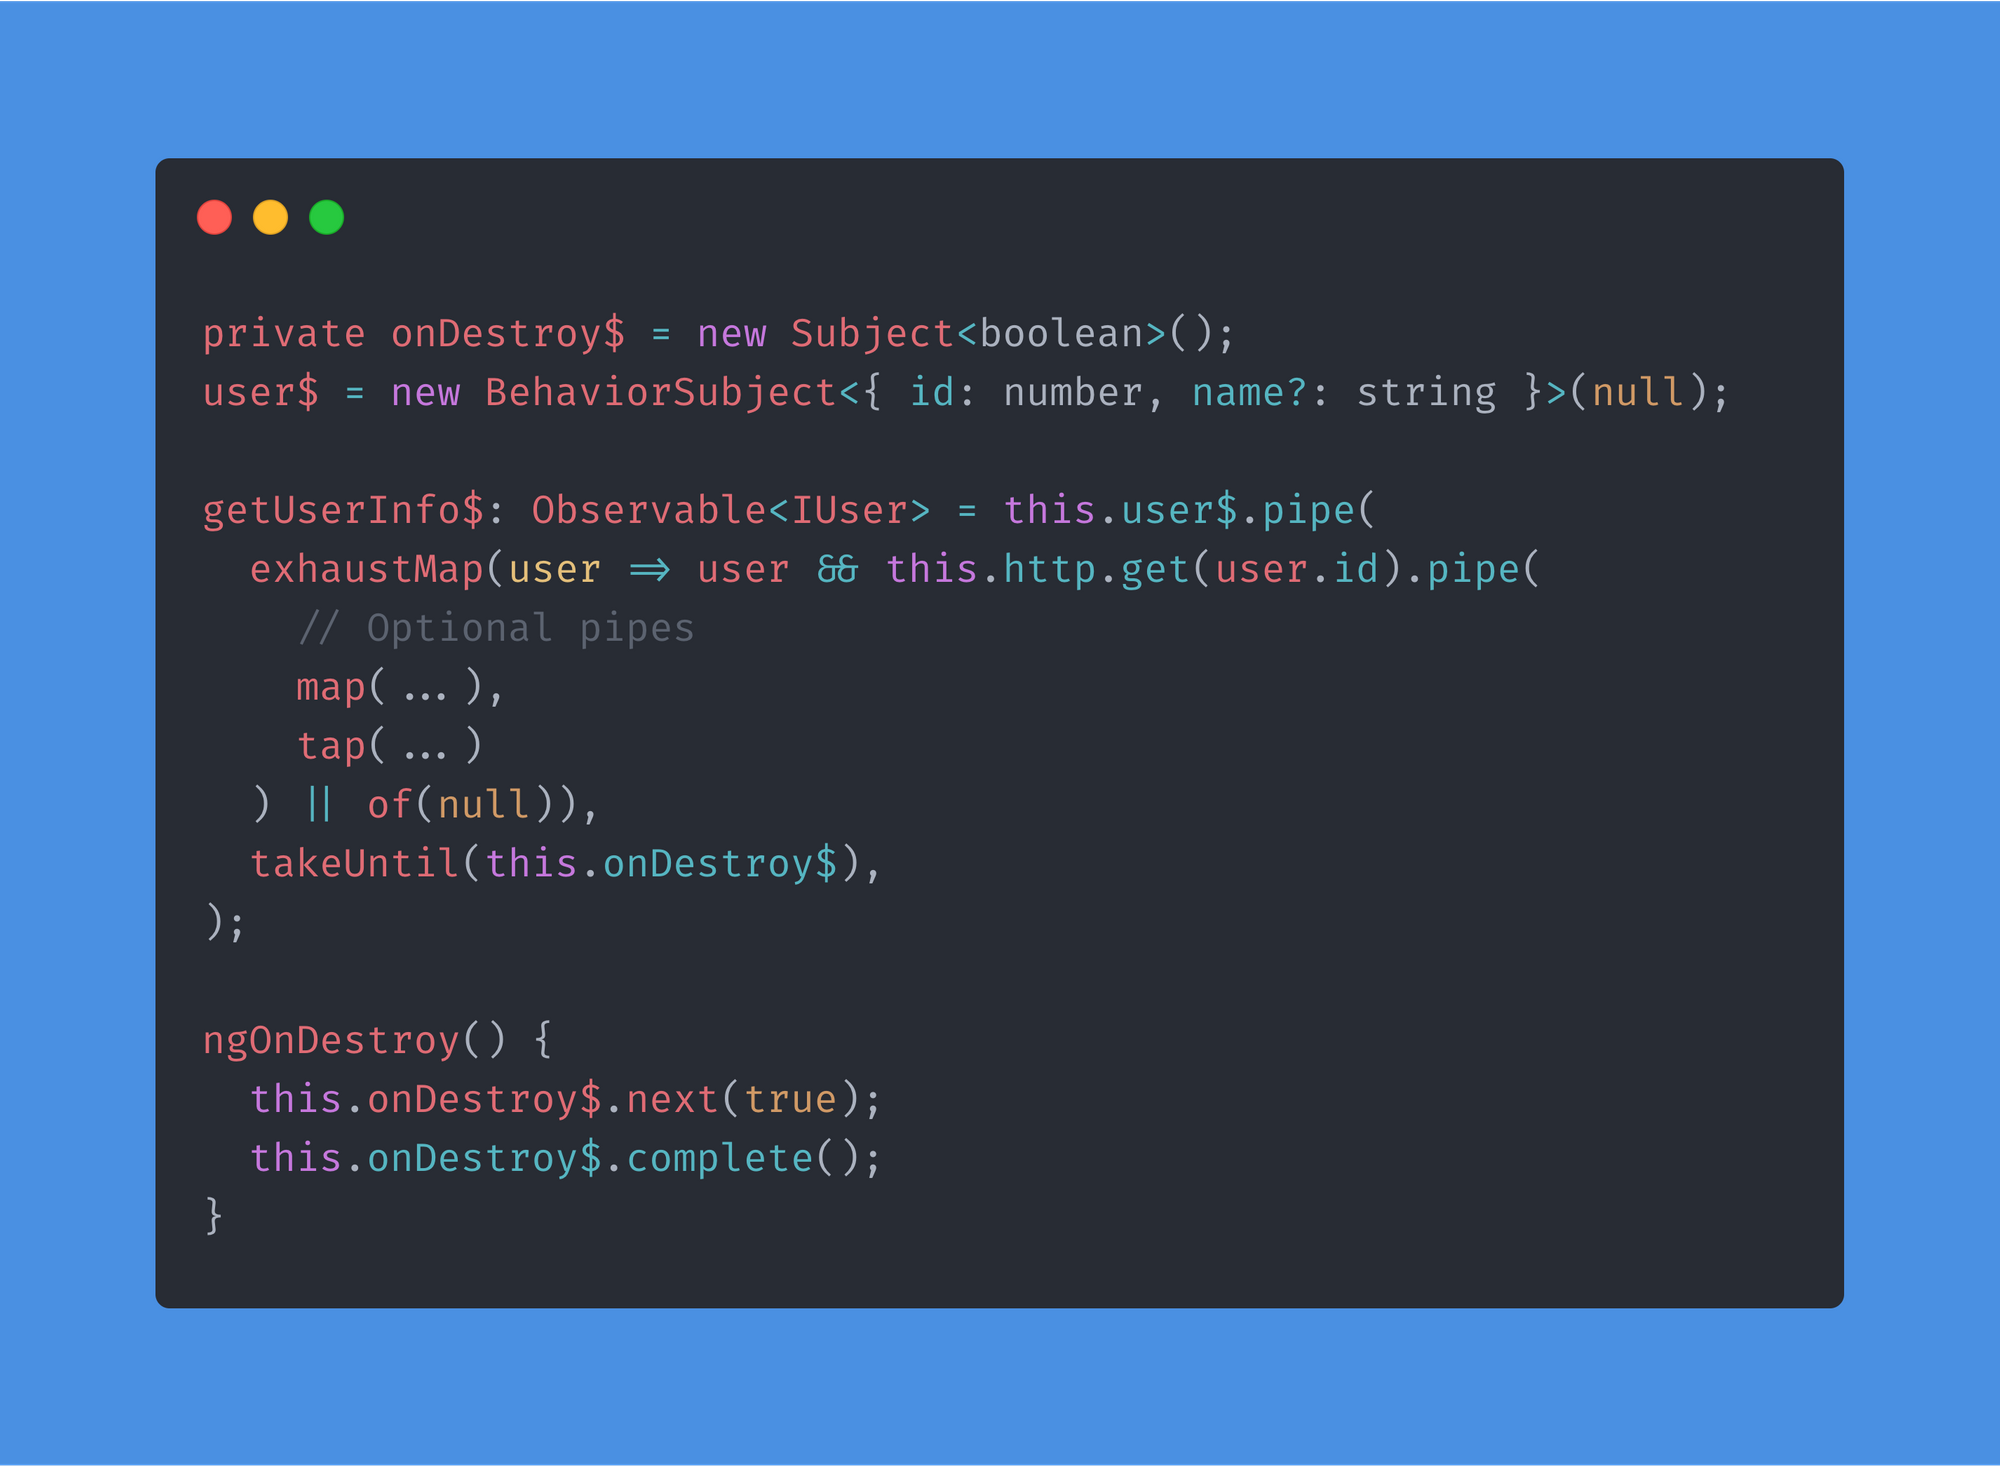
As you can see, I defined two Observables, onDestroy$ and user$. It's a good practice to have an observable which will be called when the component gets destroyed, but I'll talk later more about it.
Based on user$ BehaviorSubject, we'll create a new Observable getUserInfo$ which sends a server request - each time the user$ gets emitted:
getUserInfo$: Observable<IUser>=this.user$.pipe(exhaustMap(user=> user &&this.http.get(user.id).pipe(map(...),tap(...))||of(null)),takeUntil(this.onDestroy$),);
Create a new Observable from BehaviorSubject.
If you don't understand what's going on in this code and .pipe function is unclear for you, maybe you should first take a look at this article and then continue reading!
There are two Operators to pay attention, exhaustMap and takeUntil. Of course, you can add more operators, but these two are the most important.
Using an exhaustMap operator we can be sure that getUserInfo$will always wait for the server response, even if the user$ emits a new value, it's the opposite of the switchMap operator. See the picture below:
You can read more about RxJs Mapping here, to have a better idea of why we used exhaustMap and not other mapping operators.
takeUntil subscribes and begins mirroring the user$ Observable. It also monitors a second Observable, this.onDestroy$ that we provided. If the this.onDestroy$ emits a value, the getUserInfo$ Observable stops mirroring the user$ Observable and completes. For more info about takeUntil, see the official documentation.
Subscribing via Angular AsyncPipe
Now as we created the getUserInfo$ Observable, let's see how to subscribe to it using AsyncPipe:
<ng-container*ngIf="getUserInfo$ | async as user">
{{ user | json }}
</ng-container>
Use Angular AsyncPipe to subscribe to the getUserInfo$.
And then just emit a new value for user$ in order to trigger the server request:
<buttonmat-icon-button(click)="user$.next({ id: 2, name: 'John Doe' })">
Get user with id 2
</button>
Emit new user info, to trigger a server request.
Now, if we click the button, even if we double-click, the getUserInfo$ will send a server request and emit new user info which will be handled by Angular AsyncPipe and in turn will insert new user info into the page.
As we use takeUntil operator, we have to emit some value for this.onDestroy as well as complete it, takeUntil is optional here, as we subscribed to getUserInfo$ via Angular AsyncPipe which takes care of unsubscribing when element gets destroyed, but anyway, it's a good practice and it's good to know about it.
Make sure we unsubscribe from Observable when component gets destroyed.
Conclusion
Now we don't have to worry about memory leaking, as we did the best practices for subscribing and unsubscribing from Observables. We can be sure that our code will work faster as AsyncPipe allows us to change the changeDetection of our component to ChangeDetectionStrategy.Push, which (after me) is the best way to optimize a component and as well a good practice.
Introduction Let’s Encrypt is a Certificate Authority (CA) that provides an easy way to obtain and install free TLS/SSL certificates , thereby enabling encrypted HTTPS on web servers. It simplifies the process by providing a software client, Certbot, that attempts to automate most (if not all) of the required steps. Currently, the entire process of obtaining and installing a certificate is fully automated on both Apache and Nginx. In this tutorial, you will use Certbot to obtain a free SSL certificate for Apache on Ubuntu 18.04 and set up your certificate to renew automatically. This tutorial will use a separate Apache virtual host file instead of the default configuration file. We recommend creating new Apache virtual host files for each domain because it helps to avoid common mistakes and maintains the default files as a fallback configuration. Prerequisites To follow this tutorial, you will need: One Ubuntu 18.04 server set up by following this initial ...
1. Local Storage Events You might have already used LocalStorage, which is accessible across Tabs within the same application origin. But do you know that it also supports events? You can use this feature to communicate across Browser Tabs, where other Tabs will receive the event once the storage is updated. For example, let’s say in one Tab, we execute the following JavaScript code. window.localStorage.setItem("loggedIn", "true"); The other Tabs which listen to the event will receive it, as shown below. window.addEventListener('storage', (event) => { if (event.storageArea != localStorage) return; if (event.key === 'loggedIn') { // Do something with event.newValue } }); 2. Broadcast Channel API The Broadcast Channel API allows communication between Tabs, Windows, Frames, Iframes, and Web Workers . One Tab can create and post to a channel as follows. const channel = new BroadcastChannel('app-data'); channel.postMessage(data); And oth...
Introduction Streams are one of the major features that most Node.js applications rely on, especially when handling HTTP requests, reading/writing files, and making socket communications. Streams are very predictable since we can always expect data, error, and end events when using streams. This article will teach Node developers how to use streams to efficiently handle large amounts of data. This is a typical real-world challenge faced by Node developers when they have to deal with a large data source, and it may not be feasible to process this data all at once. This article will cover the following topics: Types of streams When to adopt Node.js streams Batching Composing streams in Node.js Transforming data with transform streams Piping streams Error handling Node.js streams Types of streams The following are four main types of streams in Node.js: Readable streams: The readable stream is responsible for reading data from a source file Writable streams: The writable stream is re...

Comments
Post a Comment