Written by: Noor Khan Posted on: February 11, 2020
How to display Data from MySQL database table in Node.js
Category: Node.js
In this tutorial, I will show you how to display data from the MySQL database table using Node.js. Even you will learn this tutorial with a simple example. In this example, All the data will display into the HTML table in the proper format. So, read all the following steps and use them in your project.
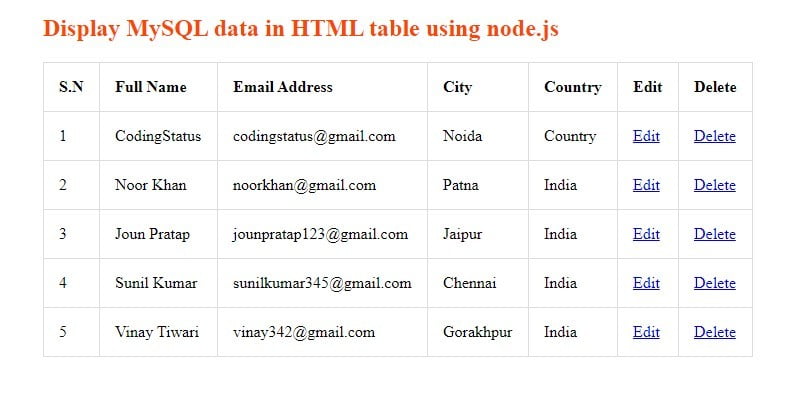
Display MySQL data in HTML table using node.js
Before getting started, You must do the following things
- You have to Install Basic Express Application like the following project folder structure
myapp/
  |__bin
  |__node_modules
  |__public
  |__routes/
  |    |__index.js
  |    |__user.js
  |__views/
  |    |__index.ejs
  |    |__user.ejs
  |    |__user-list.ejs
  |__app.js
  |__database.js
  |__package-lock.json
  |__package.json
- Write the following Node.js MySQL connection Query in the
database.jsfile.
- var mysql = require('mysql');
- var conn = mysql.createConnection({
- host: 'localhost', // Replace with your host name
- user: 'root', // Replace with your database username
- password: '', // Replace with your database password
- database: 'nodeapp' // // Replace with your database Name
- });
- conn.connect(function(err) {
- if (err) throw err;
- console.log('Database is connected successfully !');
- });
- module.exports = conn;
Write MySQL Query in Node.js to Fetch Data
Before Displaying MySQL data, You have to do the following things
- Include the database connection file
database.jsin theroutes/user.jsfile.
- var db=require('../database');
- Write the following script in the
routes/user.jsfile to fetch data from the MySQLuserstable.
- router.get('/user-list', function(req, res, next) {
- var sql='SELECT * FROM users';
- db.query(sql, function (err, data, fields) {
- if (err) throw err;
- res.render('user-list', { title: 'User List', userData: data});
- });
- });
- Include
routes/user.jsfile in the root fileapp.js
- var userRouter = require('./routes/user');
- app.use('/user',userRouter);
Complete Script: routes/user.js
- var express = require('express');
- var router = express.Router();
- var db=require('../database');
- // another routes also appear here
- // this script to fetch data from MySQL databse table
- router.get('/user-list', function(req, res, next) {
- var sql='SELECT * FROM users';
- db.query(sql, function (err, data, fields) {
- if (err) throw err;
- res.render('user-list', { title: 'User List', userData: data});
- });
- });
- module.exports = router;
Create HTML Table & Display data using Node.js
Create a file
user-list.ejs in the views folder.
Now, Use the following
HTML code and ejs Script to display data in the HTML table.- <table border="1">
- <tr>
- <th>S.N</th>
- <th>Full Name</th>
- <th>Email Address</th>
- <th>City</th>
- <th>Country</th>
- <th>Edit</th>
- <th>Delete</th>
- </tr>
- <%
- if(userData.length!=0){
- var i=1;
- userData.forEach(function(data){
- %>
- <tr>
- <td><%=i; %></td>
- <td><%=data.fullName %></td>
- <td><%=data.emailAddress %></td>
- <td><%=data.city %></td>
- <td><%=data.country %></td>
- <td><a href="/user/edit/<%=data.id%>">Edit</a></td>
- <td><a href="/user/delete/<%=data.id%>">Delete</a></td>
- </tr>
- <% i++; }) %>
- <% } else{ %>
- <tr>
- <td colspan="7">No Data Found</td>
- </tr>
- <% } %>
- </table>
You can see the above table with displaying data from
users table by entering the following URL in the browser- http://localhost:3000/user/user-list
Complete HTML Table Code: views/user-list.ejs
- <!DOCTYPE html>
- <html lang="en">
- <head>
- <title>Fetch using MySQL and Node.js</title>
- <meta charset="utf-8">
- <meta name="viewport" content="width=device-width, initial-scale=1">
- <style>
- table, td, th {
- border: 1px solid #ddd;
- text-align: left;
- }
- table {
- border-collapse: collapse;
- width: 50%;
- }
- .table-data{
- position: relative;
- left:150px;
- top:100px;
- }
- th, td {
- padding: 15px;
- }
- </style>
- </head>
- <body>
- <div class="table-data">
- <h2>Display Data using Node.js & MySQL</h2>
- <table border="1">
- <tr>
- <th>S.N</th>
- <th>Full Name</th>
- <th>Email Address</th>
- <th>City</th>
- <th>Country</th>
- <th>Edit</th>
- <th>Delete</th>
- </tr>
- <%
- if(userData.length!=0){
- var i=1;
- userData.forEach(function(data){
- %>
- <tr>
- <td><%=i; %></td>
- <td><%=data.fullName %></td>
- <td><%=data.emailAddress %></td>
- <td><%=data.city %></td>
- <td><%=data.country %></td>
- <td><a href="/user/edit/<%=data.id%>">Edit</a></td>
- <td><a href="/user/delete/<%=data.id%>">Delete</a></td>
- </tr>
- <% i++; }) %>
- <% } else{ %>
- <tr>
- <td colspan="7">No Data Found</td>
- </tr>
- <% } %>
- </table>
- </div>
- </body>
- </html>
Comments
Post a Comment